 Admin
Admin
In contemporary interior design, the surface of a table can be as expressive as the surrounding décor. Among the myriad options, a tiled table top offers a unique blend of durability, aesthetic versatility, and tactile richness that appeals to both residential and commercial settings. Whether you are reimagining a kitchen island, creating a striking coffee table, or designing a functional work surface, understanding the nuances of tiled table tops is essential for achieving a polished result.
The appeal of a tiled table top lies not only in its visual impact but also in its practical benefits. Tiles resist stains, heat, and scratches far better than many traditional finishes, making them ideal for high‑traffic areas. Moreover, the vast selection of tile colors, patterns, and textures enables designers to craft bespoke looks that can echo cultural motifs, modern minimalism, or eclectic maximalism.
Before diving into specific design strategies, it is helpful to consider how a tiled table top fits within the broader context of your space. The choice of tile, substrate, and edging will influence everything from the table’s structural integrity to the way light interacts with the surface. With thoughtful planning, a tiled table top can become a focal point that unifies a room’s palette while providing a resilient work plane.
Tiled Table Top: Materials, Design, and Maintenance

When selecting a tiled table top, the first decision revolves around the type of tile. Ceramic and porcelain tiles dominate the market due to their affordability and extensive design libraries. Porcelain, however, offers higher density and lower water absorption, making it more suitable for heavy‑use tables. Natural stone tiles—such as marble, travertine, or slate—introduce organic veining and a luxurious feel, though they demand more vigilant sealing and care.
Beyond the tile itself, the substrate plays a critical role. Plywood, MDF, or particleboard can serve as a base, but each has distinct load‑bearing capacities. For a sturdy tiled table top, a high‑grade plywood substrate (at least ¾‑inch thick) is recommended, as it resists warping under the weight of tile and adhesive. Adding a cement backer board layer further enhances stability and moisture resistance, especially in environments prone to spills.
Installation techniques also affect durability. Thinset mortar, combined with a flexible grout, creates a bond that accommodates slight movement without cracking. When the design calls for intricate patterns—like herringbone or Moroccan mosaics—precision in tile layout becomes paramount, as misalignments can compromise both aesthetics and structural soundness.
Choosing the Right Tiled Table Top for Your Space
To select the ideal tiled table top, start by evaluating the intended function. A dining table that will host family meals benefits from larger, easy‑to‑clean tiles such as 12‑inch porcelain squares. Conversely, a coffee table in a living room setting can showcase a more decorative arrangement, perhaps using small, textured encaustic tiles that add visual intrigue.
- Size and Scale: Match tile dimensions to the table’s surface area. Oversized tiles can make a small table appear larger, while a mosaic of tiny tiles can soften the edges of a massive tabletop.
- Color Palette: Align tile colors with existing wall paint, flooring, or upholstery. Neutral tones like soft greys or warm beiges provide a timeless backdrop, whereas bold blues or reds can become statement pieces.
- Pattern Integration: Consider complementary patterns elsewhere in the room. For instance, pairing a striped tiled table top with table runner patterns that echo the stripe can create cohesion without redundancy.
Surface finish is another variable. Glossy tiles reflect light and can make a space feel more open, but they also show fingerprints and water spots. Matte or textured finishes hide minor smudges and lend a more grounded, tactile quality—perfect for a rustic kitchen island.
Installation Process: From Planning to Finishing

Successful installation begins with accurate measurement. Mark the exact dimensions of the table top on the substrate and allow a ¼‑inch margin for tile cuts. Lay out the tiles on a flat surface before adhering them, testing different arrangements to achieve a balanced visual rhythm.
Applying thinset mortar with a notched trowel ensures consistent coverage. Press each tile firmly, using tile spacers to maintain uniform grout lines—typically ¼‑inch for larger tiles and ⅛‑inch for smaller mosaics. After the mortar cures (usually 24 hours), remove spacers and mix grout according to the manufacturer’s instructions.
When grouting, work in small sections, pushing the grout into the joints with a rubber float. Clean excess grout from the tile surface before it sets, then wipe the tiles with a damp sponge after about 15 minutes. Once fully cured, seal the grout to protect against staining and moisture penetration.
Maintenance Tips for a Long‑Lasting Tiled Table Top
Routine care extends the life of a tiled table top. Daily cleaning with a mild, pH‑balanced cleanser prevents residue buildup. For spills, blot immediately rather than wiping, which can spread liquids into grout lines.
- Sealing: Re‑seal grout every 6‑12 months, depending on usage intensity. Sealants enhance water resistance and make cleaning easier.
- Avoid Abrasives: Harsh scouring pads can dull glossy finishes and wear down grout.
- Heat Protection: While tiles resist heat, sudden temperature changes can cause thermal shock. Use trivets or heat pads under hot cookware.
Periodic inspection of the tile edges and grout is advisable. Small cracks or loosened tiles can be addressed promptly with fresh thinset and grout, preventing larger repairs down the line.
Design Inspirations: Creative Ways to Use Tiled Table Tops
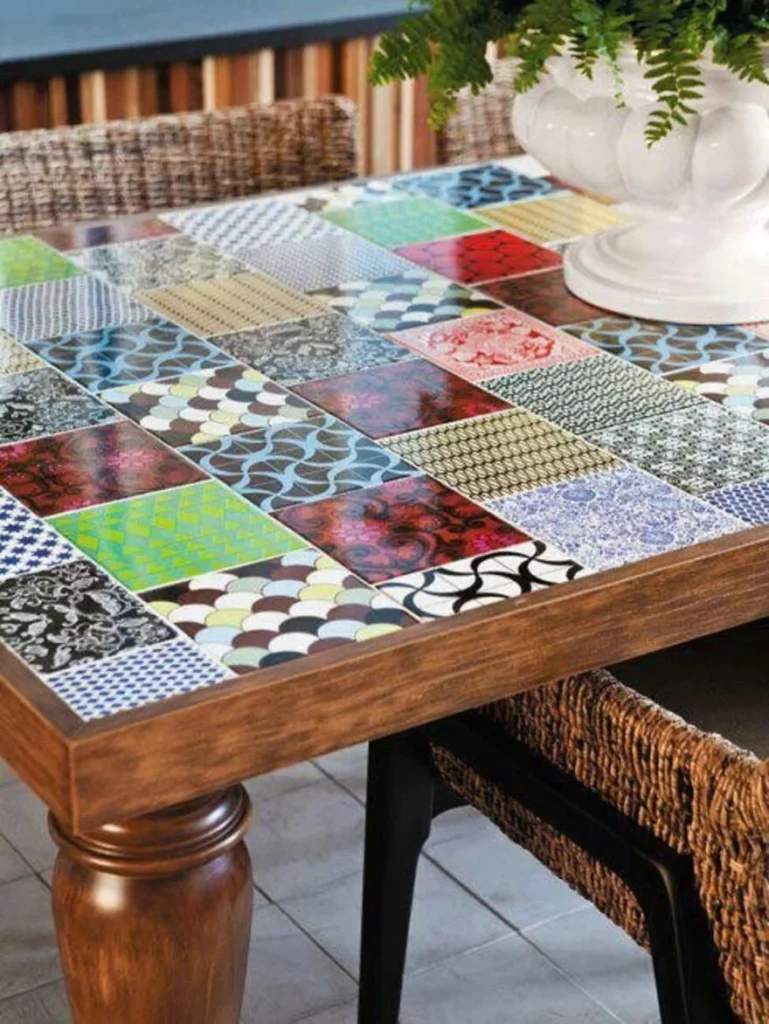
Designers often use tiled table tops to make bold statements. A black-and-white checkerboard pattern can evoke a retro diner vibe in a home bar, while a gradient of teal tiles can echo coastal themes in a beach house living area. For a more subtle approach, a single slab of marble tile can serve as a minimalist centerpiece that complements sleek metal legs.
Integrating accessories enhances the visual narrative. Pairing a tiled coffee table with thoughtfully chosen side table decor ideas—such as low-profile vases or sculptural bowls—creates layers of interest without overcrowding the surface. In a formal dining setting, a coordinated table runner pattern can tie the tiled table top to the overall table setting, achieving a harmonious composition.
For those seeking a sustainable angle, reclaimed ceramic tiles from vintage kitchens or salvaged stone can be repurposed into a unique table surface. This approach not only reduces waste but also introduces a story-rich element that resonates with eco‑conscious homeowners.
Cost Considerations and Budgeting

The expense of a tiled table top varies based on tile material, size, and installation complexity. Basic ceramic tiles may cost as little as $1–$3 per square foot, while high‑end natural stone can exceed $15 per square foot. Labor rates fluctuate by region, but budgeting an additional 30‑40% of material cost for professional installation is a safe estimate.
DIY enthusiasts can reduce costs by handling the layout and grouting themselves, though it is crucial to have the right tools—such as a quality notched trowel, tile cutter, and level. Remember that cutting errors can lead to material waste, so meticulous planning pays off financially.
When evaluating long‑term value, consider the durability factor. A well‑installed tiled table top often outlasts laminate or wood finishes, resulting in lower replacement costs over the lifespan of the furniture.
In summary, a tiled table top is more than a surface; it is a design platform that merges functionality with artistic expression. By carefully selecting materials, mastering installation techniques, and committing to regular maintenance, homeowners and designers can enjoy a resilient and visually striking centerpiece that endures for years.
