 Admin
Admin
If you’ve ever wondered how to speed up composting with coffee grounds, you’re not alone. Coffee lovers generate tons of spent beans every morning, and that seemingly wasteful residue can become a powerhouse ingredient in your compost bin. By understanding the science behind coffee grounds and applying a handful of strategic practices, you can transform your backyard compost into a fast‑acting, nutrient‑dense amendment for your garden.
Composting is essentially a controlled decay process driven by a bustling community of microorganisms, fungi, and tiny invertebrates. Each of these players thrives on a delicate balance of carbon (the “brown” material) and nitrogen (the “green” material). Coffee grounds sit in a sweet spot on the nitrogen side, offering roughly a C:N ratio of 20:1, which makes them an excellent green addition. However, simply tossing them into the pile isn’t enough to guarantee rapid results; the way you incorporate them matters.
In this article we’ll dive deep into the chemistry of coffee grounds, explore why they’re a composting hero, and outline seven actionable steps that will help you accelerate the breakdown process. Whether you’re a seasoned gardener or a first‑time composter, these tips will empower you to turn every cup of coffee into a boost for your soil.
Understanding the Role of Coffee Grounds in Compost

Before you start layering, it’s helpful to grasp why coffee grounds are so valuable. Their high nitrogen content fuels the growth of aerobic bacteria, which are the primary drivers of hot composting. Additionally, grounds contain small amounts of phosphorus, potassium, and micronutrients that enrich the final compost.
Key Benefits
- Accelerated microbial activity: Nitrogen-rich grounds stimulate the rapid proliferation of bacteria, raising pile temperature and speeding decomposition.
- Improved structure: The fine texture of grounds helps fill air pockets, promoting better aeration when mixed correctly.
- Natural pest deterrent: The slight acidity and caffeine residues can discourage certain pests, such as slugs and some insects.
7 Proven Strategies to Speed Up Composting With Coffee Grounds

1. Balance the Carbon‑to‑Nitrogen Ratio
The cornerstone of fast composting is a C:N ratio between 25:1 and 30:1. Since coffee grounds are nitrogen‑heavy, you’ll need to counterbalance them with carbon‑rich “brown” materials like dried leaves, straw, shredded newspaper, or cardboard. Aim for roughly three parts brown to one part coffee grounds by volume.
2. Keep the Pile Moist but Not Soggy
Moisture is the lifeblood of microbial activity. Coffee grounds are already moist from brewing, which can help maintain overall moisture levels. However, they can also become compacted and block airflow if the pile gets too wet. Use a simple “squeeze test”: grab a handful of compost; it should feel like a damp sponge—wet enough to hold together, but no water should drip out.
3. Shred Larger Browns for Better Integration
When you add bulky materials such as straw or cardboard, shred them into smaller pieces before mixing. This increases the surface area, allowing microbes to access carbon sources more quickly and helping the grounds distribute evenly throughout the pile.
4. Turn the Pile Regularly
Turning introduces fresh oxygen, which is essential for aerobic bacteria. A well‑aerated pile heats up faster and reduces the risk of foul odors caused by anaerobic zones. Aim to turn the compost every 5–7 days, especially during the first few weeks when the coffee grounds are actively feeding the microbes.
5. Add a Compost Accelerator
Commercial compost starters contain a blend of beneficial microbes and enzymes that can give your pile a quick boost. If you prefer a natural alternative, sprinkle a handful of garden soil or finished compost onto the coffee grounds before mixing. This inoculates the pile with a ready‑made microbial community.
6. Layer with Other Kitchen Scraps
Combine coffee grounds with other “green” kitchen waste such as fruit peels, vegetable scraps, and tea bags. This creates a more diverse nutrient profile, which supports a broader range of microorganisms. Just be mindful to avoid oily or meat‑based foods that can attract pests.
7. Use a Closed or Semi‑Closed Bin
A bin with a lid or a simple tarp cover helps retain heat while protecting the pile from excessive rain, which could cause waterlogging. At the same time, ensure there are adequate ventilation holes to allow airflow. This balance maintains the optimal temperature range of 55–65 °C (130–150 °F), where thermophilic bacteria work most efficiently.
Practical Tips for Incorporating Coffee Grounds

Now that you understand the strategies, here are some day‑to‑day practices that make the process seamless.
Collect Grounds in a Dedicated Container
Keep a small, airtight container on your kitchen counter or under the sink. Empty it daily into your compost bin or a compost tumbler. This prevents grounds from drying out and reduces the chance of mold growth before they’re mixed.
Mix Before Adding
Instead of dumping grounds directly onto the pile, sprinkle them onto a layer of brown material and then lightly toss or turn. This prevents clumping and ensures the grounds are evenly distributed.
Mind the Acidity
Fresh coffee grounds have a pH around 6.5–6.8, which is slightly acidic but not harmful in moderate amounts. If you plan to use a large quantity (more than 25% of the total volume), consider adding a few handfuls of garden lime to neutralize excess acidity.
Combine with Water‑Retaining Additives
If your climate is dry, mix in some shredded newspaper or coconut coir to hold moisture. Conversely, in a rainy region, add extra dry leaves to keep the pile from becoming soggy.
Monitoring Progress and Knowing When It’s Ready

Speeding up compost doesn’t mean rushing it to the point of incompleteness. A well‑finished compost should have a dark, crumbly texture, an earthy smell, and no recognizable food particles. Here’s how to gauge readiness:
- Temperature check: Use a compost thermometer. When the pile consistently stays below 40 °C (105 °F) for a few days, the active phase is ending.
- Smell test: A pleasant, soil‑like aroma indicates proper aerobic decomposition. A sour or ammonia smell suggests excess nitrogen or poor aeration.
- Visual inspection: If you can’t easily spot coffee grounds or other original materials, the compost is nearing maturity.
For those who love detailed guides on home improvement, you might also find the article The Ultimate DIY Guide to Replacing a Wax Ring on Your Toilet – No Leaks, No Stress! useful when setting up a composting system in a bathroom‑adjacent space, ensuring waterproofing and proper ventilation.
Integrating Finished Compost Into Your Garden
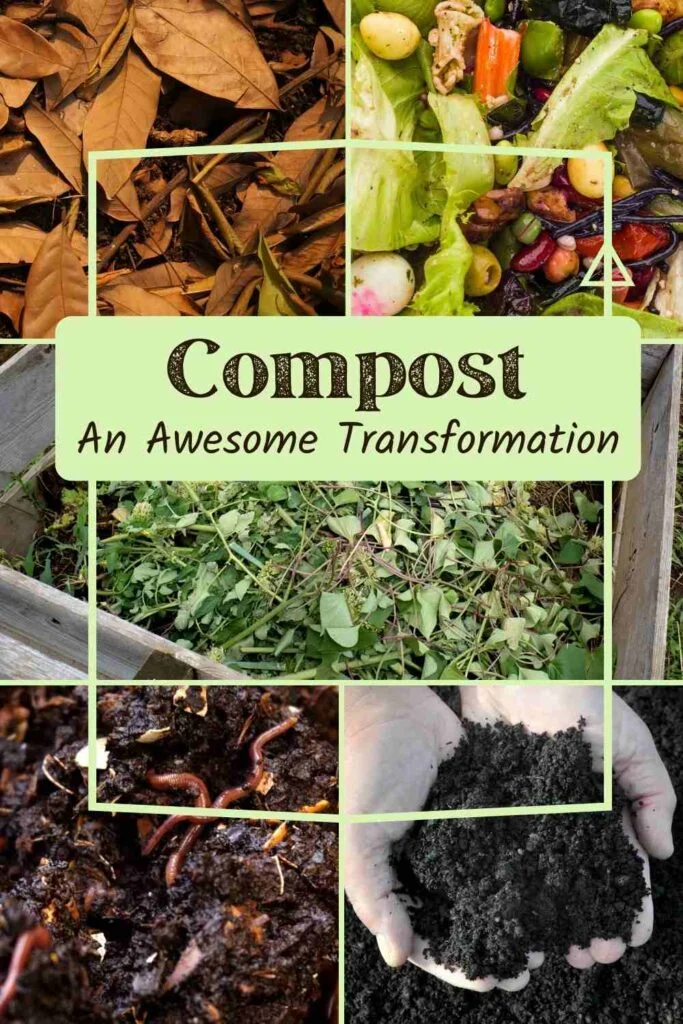
Once your coffee‑enhanced compost is ready, it can be used in several ways to maximize plant health:
- Top dressing: Sprinkle a thin layer around the base of perennials and shrubs to improve soil structure and retain moisture.
- Soil amendment: Mix into garden beds before planting to boost nutrient levels and improve tilth.
- Potting mix additive: Combine with equal parts peat or coconut coir for a homemade potting medium that encourages vigorous root growth.
Remember that coffee grounds also contribute a modest amount of nitrogen to the finished compost, so you may need to balance with additional organic matter if you plan to use it on nitrogen‑sensitive plants such as blueberries.
Common Mistakes and How to Avoid Them

Overloading the Pile with Coffee Grounds
While coffee grounds are beneficial, too many can create a compacted, soggy environment that limits airflow. Stick to the 1:3 ratio with brown materials to keep the pile fluffy.
Neglecting Aeration
Even with the best carbon balance, a pile that isn’t turned regularly will become anaerobic, producing unpleasant odors and slowing decomposition. Set a reminder on your phone to turn the compost weekly.
Adding Contaminated Grounds
Avoid grounds that contain added sugars, syrups, or dairy. These can attract pests and introduce unwanted microbes that compete with the beneficial bacteria.
Ignoring Temperature
Thermophilic bacteria thrive above 55 °C. If the pile never reaches this temperature, consider adding more nitrogen (e.g., extra coffee grounds or fresh kitchen waste) or insulating the bin with a tarp.
Advanced Techniques for the Ambitious Gardener

If you’re ready to take your composting to the next level, consider these advanced methods that pair perfectly with coffee grounds.
Compost Tea Production
Steep a handful of finished coffee‑ground‑rich compost in aerated water for 24–48 hours. The resulting “compost tea” can be used as a foliar spray or soil drench, delivering a concentrated dose of beneficial microbes directly to plant roots.
Vermicomposting with Coffee Grounds
Red wigglers love coffee grounds when mixed with bedding material like shredded newspaper. Maintain a moist, but not wet, environment and you’ll harvest nutrient‑dense worm castings faster than traditional hot composting.
Layered Bin Systems
Design a three‑compartment bin where the bottom layer is coarse wood chips (for drainage), the middle layer is mixed coffee grounds and greens, and the top layer is a thick blanket of browns. This stratification optimizes aeration and moisture retention.
For those interested in broader home projects, the article The Ultimate 110 Volt Hot Water Heater Guide: Power, Safety, and Savings Unveiled offers insight into energy‑efficient solutions that can complement an eco‑friendly garden by reducing overall household carbon footprint.
By applying these strategies, you’ll notice your compost pile heating up more quickly, breaking down in weeks rather than months, and yielding a dark, crumbly amendment that will invigorate any garden bed.
Ultimately, the secret to speeding up composting with coffee grounds lies in balance—balancing nitrogen with carbon, moisture with air, and effort with observation. Treat each cup of coffee not as waste, but as an opportunity to feed the soil microbes that keep your garden thriving. With the right techniques, your kitchen leftovers will become a catalyst for healthier plants, richer harvests, and a more sustainable lifestyle.
