 Admin
Admin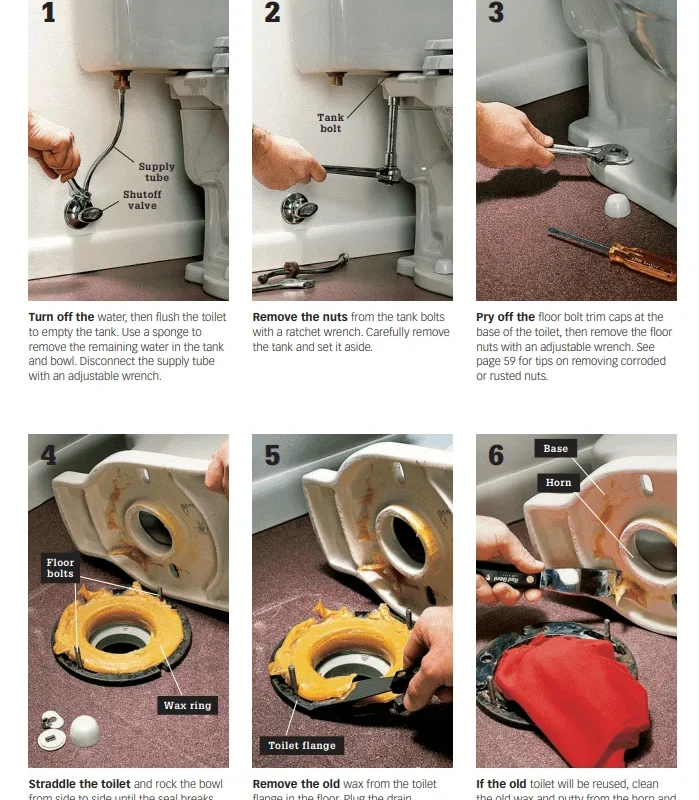
When a toilet starts leaking at its base, the culprit is almost always a worn‑out wax ring. Replacing that small but crucial component can seem intimidating, especially if you’ve never lifted a toilet before. However, with the right tools, a clear plan, and a little patience, you can fix the problem yourself and restore a watertight seal without calling a plumber. This guide walks you through every stage—from preparation to final testing—so you can tackle the job like a pro.
In this article, we’ll cover why wax rings fail, what alternatives exist, and the precise steps needed to remove the old ring, install a new one, and ensure a leak‑free finish. By the end, you’ll have the confidence to handle the most common toilet leak issue and keep your bathroom dry and functional.
Why the Wax Ring Matters and When It Needs Replacing

The wax ring sits between the toilet’s flange and the bottom of the bowl, creating a seal that prevents water, waste, and sewer gases from escaping. Over time, the wax can deteriorate, become brittle, or shift out of place, especially after repeated flushing or a minor “rocking” of the toilet. Signs that the wax ring needs replacement include:
- Visible water pooling around the base of the toilet.
- A foul odor that seems to come from the floor.
- Loose or wobbly toilet when you sit on it.
- Constantly needing to tighten the closet bolts.
If you ignore these clues, you risk water damage to the subfloor, mold growth, and costly repairs. Replacing the wax ring is a straightforward, low‑cost solution that can be completed in under an hour with basic tools.
Tools and Materials You’ll Need

Essential Tools
- Adjustable wrench or a set of socket wrenches (½‑inch is typical).
- Flat‑head screwdriver.
- Putty knife or a thin scraper.
- Rubber gloves and safety glasses.
- Bucket or large bowl (to catch any residual water).
- Level (optional, for checking toilet alignment).
Materials
- New wax ring (standard or reinforced with a flange, depending on your flange condition).
- Wax-free gasket (optional, for a more durable seal).
- New closet bolts and washers (recommended if the old ones are corroded).
- Plumber’s tape (for re‑securing the water supply line).
Having these items on hand will keep you from making unnecessary trips to the hardware store mid‑project.
Step‑by‑Step Procedure

1. Shut Off the Water Supply
Locate the shut‑off valve on the wall behind the toilet. Turn the knob clockwise until it stops. Open the toilet’s flush valve to release any remaining water in the tank and bowl. Use a bucket to mop up any residual water that spills out when you lift the tank.
2. Disconnect the Water Supply Line
Place a bucket under the supply line connection. Using an adjustable wrench, loosen the coupling nut that attaches the supply line to the bottom of the tank. Once loose, pull the line away and let any remaining water drain into the bucket.
3. Remove the Toilet Lid and Tank (If Needed)
If you have a two‑piece toilet, it’s easier to work with the tank removed. Unscrew the bolts that secure the tank to the bowl, lift the tank straight up, and set it on a padded surface. For one‑piece toilets, you can skip this step and go directly to unbolting the bowl.
4. Loosen and Remove the Closet Bolts
Under the base of the toilet, you’ll see two (sometimes three) bolts secured with nuts. Using a wrench, turn the nuts counter‑clockwise to loosen them. Once loose, gently rock the toilet back and forth to break the seal. If the toilet is stuck, cut the caulk around the base with a utility knife.
5. Lift the Toilet
With the bolts removed, carefully lift the toilet straight up. It’s heavy—typically 70‑120 lb—so consider enlisting a helper. Place the toilet on a piece of cardboard or a protective blanket to avoid scratching the floor.
6. Inspect the Flange and Floor
Look at the closet flange (the circular pipe fitting on the floor). Check for cracks, corrosion, or a gap between the flange and the floor. If the flange is damaged, you’ll need to repair or replace it before installing a new wax ring. A reinforced wax ring with a built‑in flange can compensate for minor height discrepancies.
7. Remove the Old Wax Ring
Using a putty knife, scrape away the remnants of the old wax from both the flange and the bottom of the toilet. Ensure the surfaces are clean and dry; any leftover wax can prevent a proper seal.
8. Install the New Wax Ring
Place the new wax ring on the flange, ensuring the tapered side (if present) faces the toilet. For a wax‑free gasket, follow the manufacturer’s instructions—usually the gasket slides onto the flange first, then the toilet sits on top.
9. Re‑Position the Toilet
Lower the toilet straight down onto the wax ring, aligning the bolt holes with the closet bolts. Press firmly and evenly to compress the wax, creating a solid seal. Rock the toilet gently to confirm it sits level; if it wobbles, adjust the wax ring or use shims beneath the base.
10. Secure the Closet Bolts
Insert new bolts (or reuse the old ones if they’re in good shape) through the holes in the toilet base. Place washers and nuts on the underside and tighten them just enough to hold the toilet without overtightening—excessive force can crack the porcelain.
11. Reattach the Tank (If Removed)
Place the tank back onto the bowl, align the bolt holes, and reinstall the bolts with washers and nuts. Tighten evenly, alternating sides to keep the tank level.
12. Reconnect the Water Supply Line
Wrap plumber’s tape around the tank’s inlet threads, then screw the supply line back on. Tighten the coupling nut with the wrench, being careful not to overtighten.
13. Test for Leaks
Turn the shut‑off valve counter‑clockwise to restore water flow. Allow the tank to fill, then flush several times. Inspect the base of the toilet, the water supply connection, and the bolts for any signs of dripping. If a leak appears, gently tighten the bolts a bit more or reseat the wax ring if necessary.
Tips for a Long‑Lasting Seal
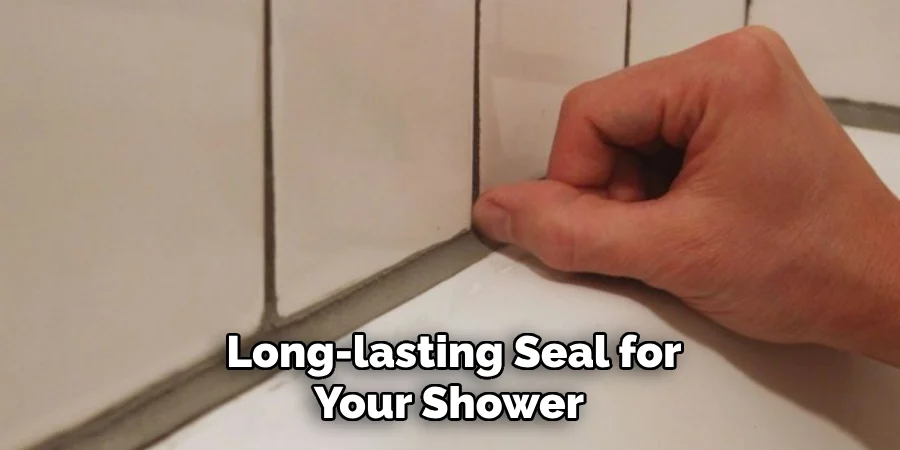
- Use a reinforced wax ring if the flange is slightly low or if you’ve experienced recurring leaks.
- Apply a thin bead of plumber’s putty around the flange before placing the wax ring for added stability (avoid excessive putty, which can interfere with the seal).
- Never overtighten the closet bolts. A snug fit is enough; overtightening can crack the porcelain or compress the wax too much, leading to leaks.
- Check the floor condition. If the subfloor is damaged by previous leaks, repair it before reinstalling the toilet to prevent future problems.
- Consider a wax‑free gasket for households with frequent temperature fluctuations, as these gaskets are more resistant to deformation.
When to Call a Professional
Although most homeowners can replace a wax ring on their own, certain situations warrant professional assistance:
- The flange is severely cracked, corroded, or missing.
- There is extensive water damage to the subfloor requiring replacement.
- The toilet is a wall‑hung model, which uses a different sealing system.
- You feel uncomfortable lifting and moving a heavy toilet.
If any of these conditions apply, a licensed plumber can ensure the job is done safely and up to code.
Additional Resources

For a deeper dive into related plumbing topics, check out The Ultimate 110 Volt Hot Water Heater Guide, which explains how proper water heating can affect overall bathroom performance. If you’re interested in broader home improvement ideas, our guide on How to Replace a Toilet Wax Ring Like a Pro – No Leaks Guaranteed! offers additional troubleshooting tips and visual aids.
Replacing a wax ring is a skill every homeowner should master. Not only does it save money, but it also empowers you to maintain a healthy, leak‑free bathroom. With the steps outlined above, you’ll be equipped to handle this common repair efficiently and confidently. Remember to work methodically, respect the weight of the fixture, and test thoroughly before calling the job complete. Your bathroom—and your wallet—will thank you.
