 Admin
Admin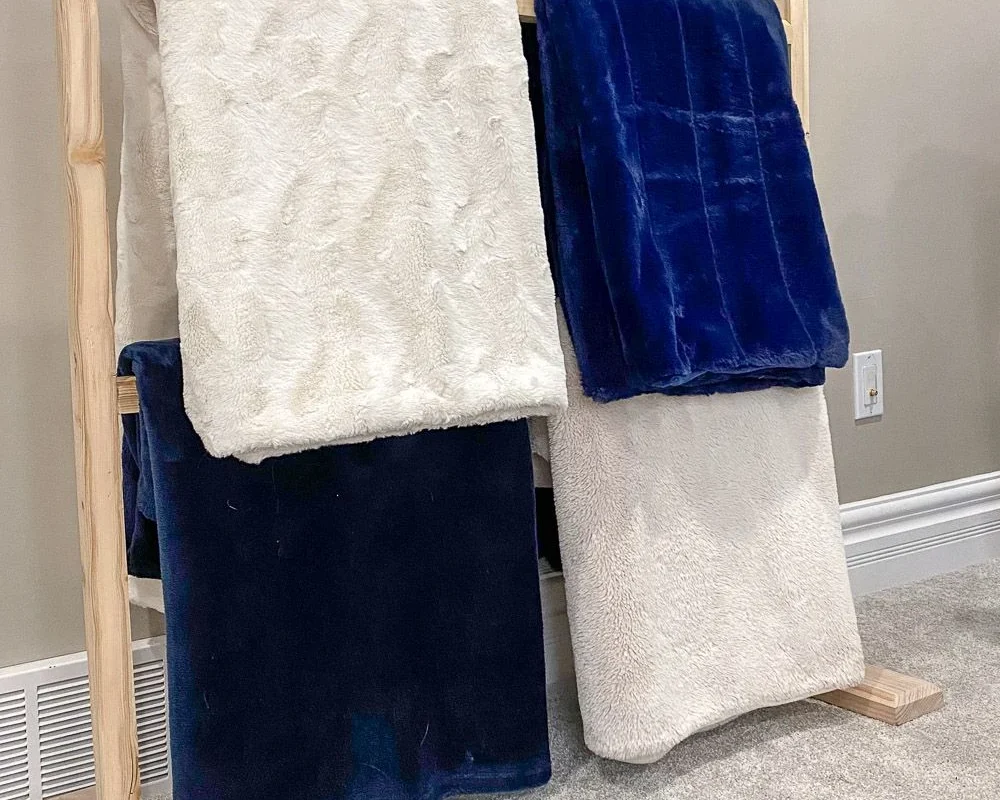
When it comes to keeping your living space tidy and inviting, a well‑designed blanket rack can make a surprising difference. Not only does it provide a dedicated spot for cozy throws and blankets, but it also adds a decorative element that can complement the overall aesthetic of a room. For many homeowners, buying a ready‑made rack often means compromising on size, finish, or price. This is where a blanket rack diy becomes an appealing solution: you can tailor the dimensions, choose the exact wood or metal finish you love, and even incorporate additional features such as hooks or shelves.
Embarking on a blanket rack diy project also offers a rewarding hands‑on experience. Whether you are a seasoned carpenter or a weekend hobbyist, building your own rack sharpens practical skills while delivering a functional piece that reflects your personal style. In the following guide, we walk through every stage—from selecting materials and drafting a simple plan to assembling, finishing, and styling the final product. By the end, you’ll have the confidence to create a sturdy, attractive blanket rack that fits seamlessly into your bedroom or living area.
Before we dive into the construction details, it’s worth considering why a custom blanket rack diy often outperforms mass‑produced alternatives. A tailor‑made rack can be positioned exactly where you need it—beside a sofa, against a wall, or even freestanding in a corner. You also have the freedom to match the rack’s finish with existing furniture, whether that means a sleek painted surface, a warm natural wood grain, or an industrial metal look. These choices not only enhance visual harmony but also ensure the rack can bear the weight of heavier blankets without sagging.
Blanket Rack Diy: Step‑by‑Step Guide to Building Your Own

Materials Needed for a Blanket Rack Diy
Choosing the right materials is the foundation of a successful blanket rack diy. Below is a list of common supplies that balance durability, aesthetics, and cost:
- Wood options: pine, oak, or reclaimed barn wood—each provides a different grain and strength profile.
- Metal alternatives: steel pipe, aluminum brackets, or wrought‑iron rods for an industrial vibe.
- Fasteners: wood screws (1½‑2 inches), drywall anchors if mounting to plaster, and metal brackets if opting for a metal frame.
- Finishing supplies: sandpaper (120‑220 grit), wood stain or paint, clear polyurethane for protection.
- Tools: circular saw or miter saw, drill with appropriate bits, level, measuring tape, and a carpenter’s square.
For those who enjoy a mixed‑material look, you can combine a wooden base with metal arms, creating a hybrid design that adds visual interest while maintaining strength.
Design Considerations and Space Planning
Before cutting any material, assess the space where the blanket rack diy will reside. Measure the wall width, ceiling height, and the distance from surrounding furniture. A typical blanket rack spans 48‑60 inches in length and stands 30‑36 inches tall, but these dimensions can be adjusted to suit a narrow hallway or a large bedroom.
Consider the following design elements:
- Mounting style: wall‑mounted versus freestanding. Wall‑mounted racks free up floor space, while freestanding units can be moved as needed.
- Number of tiers: single‑rod racks are simple, but adding a second or third rod increases storage capacity.
- Additional hooks: integrate small hooks for scarves, hats, or keys to boost functionality.
- Finish harmony: match the rack’s color or stain with nearby nightstands, dressers, or the headboard. For inspiration, explore blanket holder ideas that showcase a variety of finishes.
Construction Process for Your Blanket Rack Diy
With the design finalized, follow these sequential steps to assemble the rack:
- Cut the lumber: Using a miter saw, cut two vertical side pieces to the desired height (typically 32 inches). Then cut the horizontal top and bottom rails to the chosen length.
- Sand all edges: Smooth rough cuts with 120‑grit sandpaper, then finish with 220‑grit for a polished surface.
- Assemble the frame: Attach the top and bottom rails to the side pieces using wood screws and wood glue for added stability. A carpenter’s square ensures right angles.
- Install the rod(s): Drill two holes at the desired height(s) on the front face of the frame. Insert metal or wooden rods, securing them with brackets or set screws.
- Mount the rack: Locate wall studs with a stud finder. Pre‑drill pilot holes and anchor the rack using heavy‑duty brackets or lag bolts. If a freestanding design is preferred, attach a sturdy base panel to the bottom of the frame.
- Finishing touches: Apply your chosen stain or paint. Once dry, seal with a clear polyurethane coat to protect against moisture and everyday wear.
Finishing Touches and Styling Your Blanket Rack Diy
The final appearance of a blanket rack diy can elevate the entire room. After the protective coat dries, consider adding decorative elements:
- Wrap a thin rope or fabric strip around the rods for a softer look.
- Attach small decorative brackets in contrasting metal finishes.
- Place a few decorative pillows or a small plant on the lower shelf if you opted for a freestanding design.
These details not only enhance visual appeal but also integrate the rack into the room’s broader décor theme. If your bedroom features a chair rail, aligning the rack’s top edge with the rail can create a cohesive line that feels intentional and polished.
Safety Tips for Your Blanket Rack Diy
While a blanket rack diy is generally straightforward, safety should never be overlooked:
- Always wear safety goggles when cutting or drilling.
- Secure the workpiece firmly to prevent slipping.
- Use appropriate anchors for the wall type—drywall anchors for plaster walls, toggle bolts for concrete.
- Check weight limits: a single wooden rod typically holds up to 15 pounds, but adding reinforcement brackets can increase capacity.
- Inspect the finished rack periodically for loose screws or signs of wear, especially if it holds heavy blankets.
Creative Variations and Customization Ideas
Once you’ve mastered the basic blanket rack diy, you can experiment with several customizations to suit specific tastes:
- Industrial look: Combine black metal pipes with reclaimed wood planks for a loft‑style aesthetic.
- Minimalist design: Use thin, brushed aluminum rods and a simple floating shelf without visible brackets.
- Child‑friendly version: Paint the rack in bright colors and add lower hooks for kids’ blankets or toys.
- Multi‑functional piece: Incorporate a small bookshelf or a charging station on the bottom shelf, turning the rack into a hybrid storage solution.
These variations demonstrate the versatility of a blanket rack diy, proving that a functional item can also serve as a statement piece.
By now you should feel equipped to embark on your own blanket rack diy project, from careful planning and material selection to precise construction and stylish finishing. The satisfaction of creating a custom piece that meets your exact needs—and the added benefit of a clutter‑free, organized space—makes the effort well worth it. Whether you choose a sleek modern design or a rustic reclaimed‑wood version, your new blanket rack will not only keep blankets within easy reach but also enhance the overall look of your bedroom or living area.
