 Admin
Admin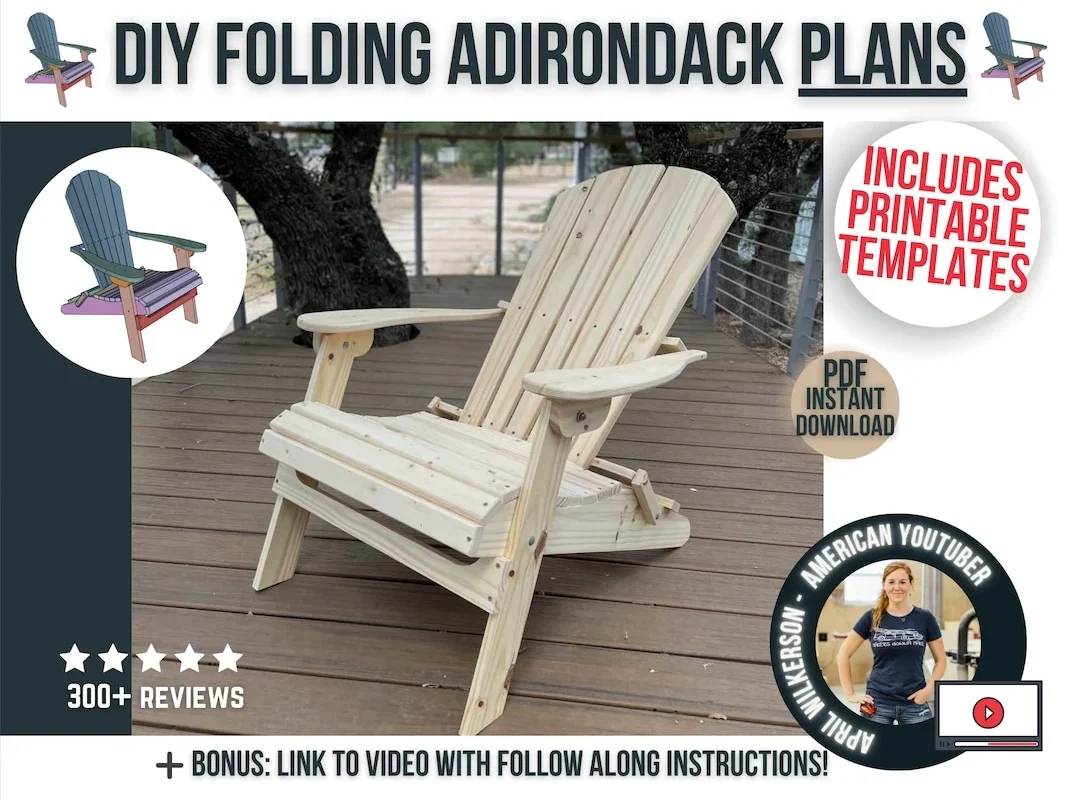
There’s something undeniably satisfying about crafting your own outdoor furniture. Among the many classic designs, the Adirondack chair stands out for its relaxed silhouette, sturdy construction, and timeless appeal. Yet, traditional Adirondack chairs are permanent fixtures that can dominate a small patio or garden nook. For those who crave flexibility without sacrificing comfort, folding Adirondack chair plans offer the perfect solution.
These plans blend the iconic slatted back and wide seat of an Adirondack chair with a clever hinge system that lets the chair collapse flat for storage or transport. Whether you’re a seasoned woodworker or a weekend DIY enthusiast, the following guide walks you through every stage—from material selection to final finishing—so you can build a chair that looks great, folds easily, and endures the elements.
Beyond the practical advantages, a folding Adirondack chair adds a touch of rustic charm to any outdoor setting, echoing the relaxed vibe of a lakeside cabin or a backyard retreat. Let’s explore how to bring this versatile piece to life, step by step.
Folding Adirondack Chair Plans: Overview and Core Concepts
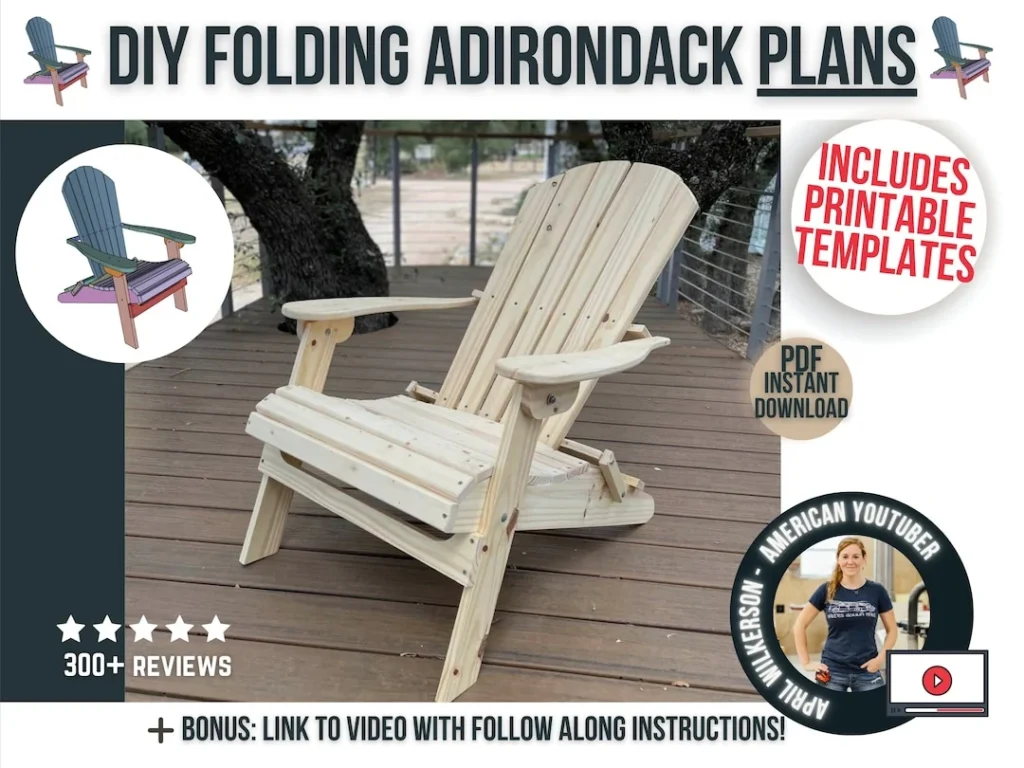
The success of any woodworking project starts with a clear understanding of the design’s fundamentals. Folding Adirondack chair plans hinge on three core ideas: ergonomic comfort, structural stability, and a reliable folding mechanism.
- Ergonomic comfort: The classic sloped back, wide armrests, and deep seat are engineered to support the body naturally, encouraging a relaxed posture.
- Structural stability: Traditional Adirondack chairs use sturdy joinery—mortise‑and‑tenon, dowels, or pocket screws—to keep the frame rigid under weight.
- Folding mechanism: The addition of hinge brackets on the back legs and a lockable latch on the seat allows the chair to collapse without compromising strength.
When you follow these Folding Adirondack Chair Plans, you’ll notice a seamless transition between the timeless aesthetic and modern convenience. Below, each component is broken down with precise measurements, tool recommendations, and woodworking tips.
Materials and Tools Required for Folding Adirondack Chair Plans
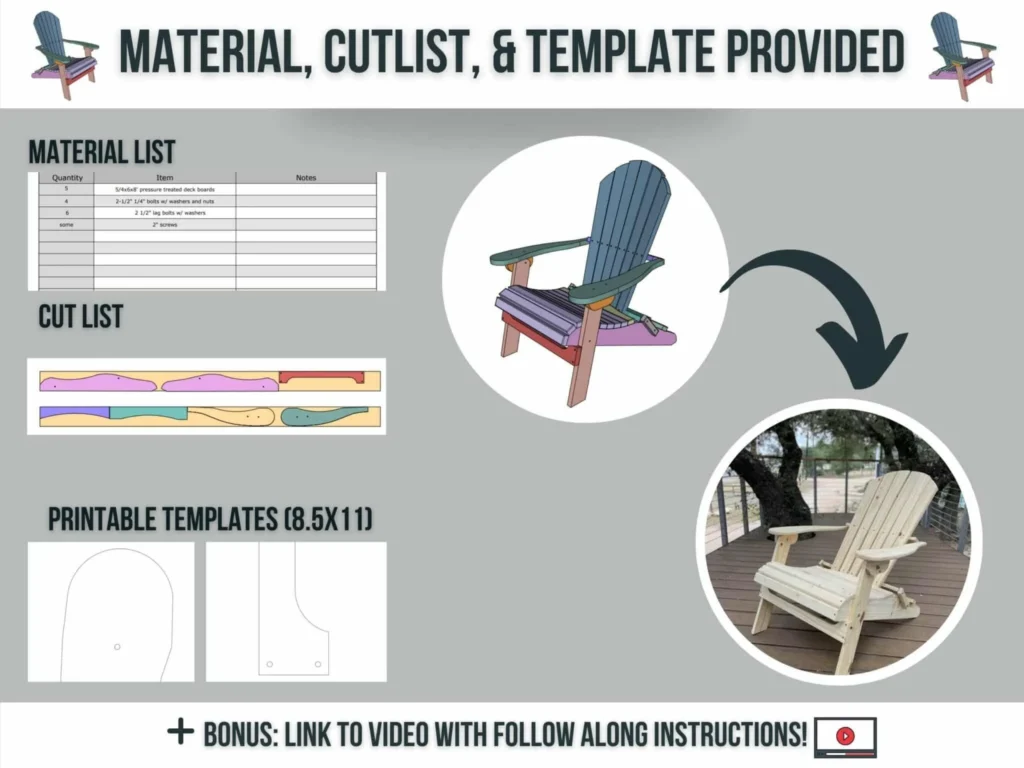
Choosing the right wood and hardware is essential for durability, especially in outdoor environments where moisture and temperature fluctuations are common.
- Wood species: Cedar, redwood, or pressure‑treated pine are popular choices because they resist rot and are lightweight enough for folding designs.
- Dimensions: Most plans call for 1‑inch thick boards cut to lengths ranging from 12 inches for armrest slats to 36 inches for the seat platform.
- Hardware: Stainless‑steel hinge brackets (minimum 2 inches long), a locking latch, deck screws (2‑inch), and wood glue.
- Finishing supplies: Exterior‑grade stain or paint, spar urethane, and a brush or sprayer for even coverage.
- Tools: Circular saw or table saw, miter saw, drill with countersink bits, orbital sander, measuring tape, carpenter’s square, and a clamping set.
Investing in quality materials may increase the upfront cost, but it pays dividends in longevity and reduced maintenance. For example, pairing the chair with a fireproof mat under a nearby wood stove can protect both the floor and the chair’s finish from heat damage.
Step‑by‑Step Construction Guide for Folding Adirondack Chair Plans
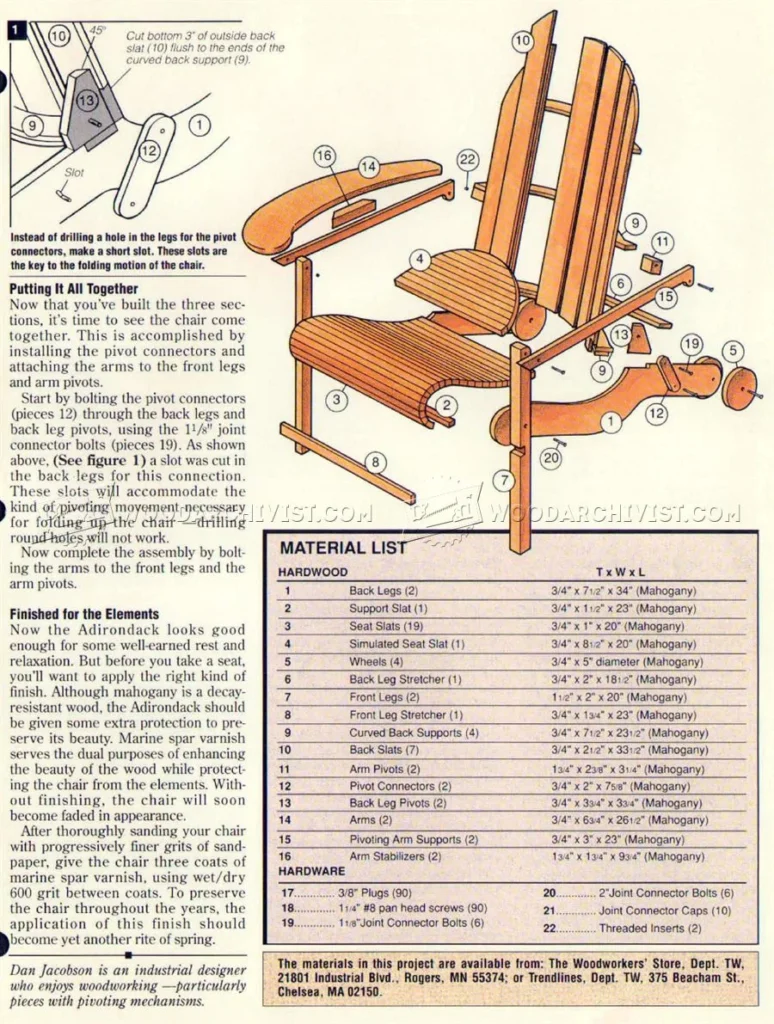
With materials assembled, the build proceeds through a logical sequence that minimizes waste and ensures each joint aligns correctly. Below is a concise roadmap, followed by detailed instructions for each stage.
- Cutting and prepping the lumber
- Assembling the back frame
- Constructing the seat platform
- Building the armrests and slats
- Installing the folding hinges and latch
- Sanding, staining, and sealing
- Testing the fold and making adjustments
Cutting and Preparing the Lumber
Accurate cuts lay the foundation for a stable chair. Use a miter saw for straight cuts and a table saw for ripping boards to width. After each cut, sand the edges lightly to remove splinters and ensure a snug fit.
Typical cut list for a single chair (all measurements in inches):
- Back legs: 2 × 2 × 36 (two pieces)
- Front legs: 2 × 2 × 30 (two pieces)
- Seat frame rails: 1 × 3 × 24 (two pieces) and 1 × 3 × 30 (two pieces)
- Seat slats: 1 × 3 × 24 (four pieces, spaced 1½ inches apart)
- Armrest supports: 1 × 2 × 32 (two pieces)
- Armrest slats: 1 × 2 × 28 (three pieces)
Apply a coat of exterior wood sealer before assembly to protect cut ends from moisture absorption.
Assembling the Back Frame
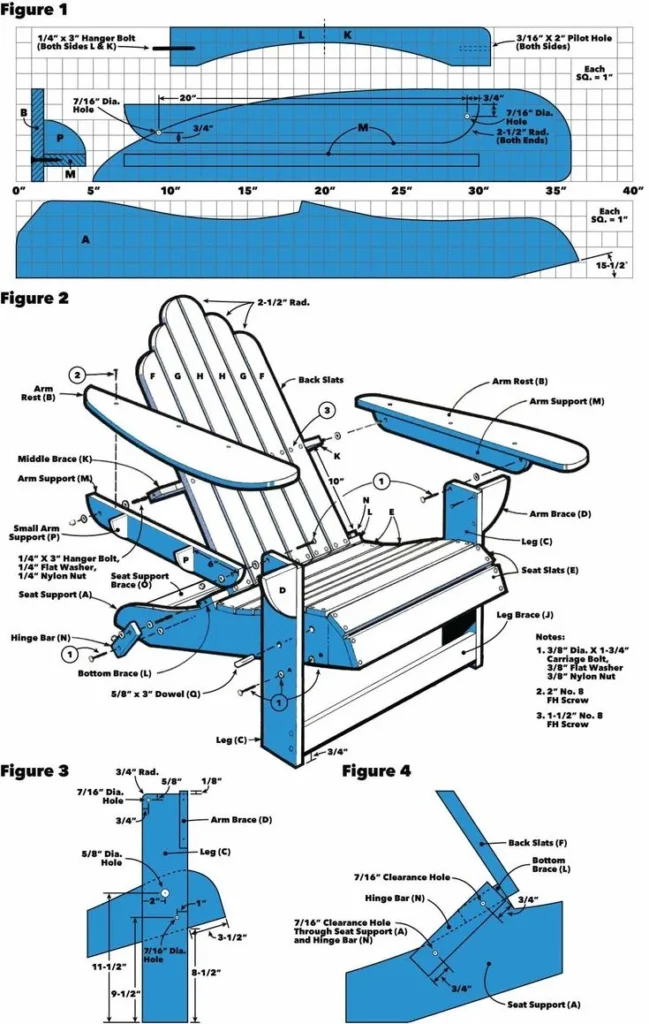
The back frame consists of two vertical back legs connected by a slatted back. Lay the two back legs parallel, then attach the slats using pocket hole screws or dowels. Ensure the slats are angled slightly backward (approximately 5 degrees) to enhance comfort.
After the slats are secured, pre‑drill holes for the hinge brackets near the top of each back leg. The hinges will later attach to the front legs, enabling the folding action.
Constructing the Seat Platform
Build a rectangular frame using the seat rails. Join the longer rails (30‑inch) to the shorter rails (24‑inch) with pocket holes, reinforcing each corner with wood glue and a screw. Once the frame is square, attach the seat slats across the width, maintaining even spacing.
For added stability, insert a support beam (1 × 3) running mid‑span, bolted to the frame with metal brackets. This prevents the seat from sagging when weight is applied.
Building Armrests and Slats
Armrest supports are attached to the top of the front legs and the back legs. Secure them with long deck screws, ensuring they protrude enough to hold the armrest slats comfortably. The slats are then fastened to the supports, creating the iconic wide arm that also serves as a convenient place to set a drink.
Installing the Folding Hinges and Locking Latch
Now comes the defining feature of the Folding Adirondack Chair Plans: the hinges. Align the hinge plates on the inside faces of the back and front legs, positioning them about 4 inches from the seat edge. Use stainless‑steel screws to attach the hinges, making sure they move freely.
Next, mount the locking latch on the seat frame’s front edge. The latch engages with a corresponding notch on the back leg when the chair is open, preventing accidental folding. Test the mechanism repeatedly to verify smooth operation.
Sanding, Staining, and Sealing
Before applying any finish, sand the entire chair with 120‑grit sandpaper, then progress to 220‑grit for a smooth surface. Wipe away dust with a tack cloth, then apply an exterior‑grade stain of your choice. Allow the stain to penetrate for 15 minutes before wiping excess.
Seal the stained wood with two coats of spar urethane, sanding lightly between coats with 320‑grit sandpaper. This finish protects the chair from UV rays, rain, and temperature swings, ensuring it remains vibrant for years.
Testing the Fold and Final Adjustments
Once the finish cures (usually 24‑48 hours), sit in the chair and engage the latch. Fold the chair by releasing the latch and swinging the back legs inward. If the chair feels loose or the latch doesn’t hold, tighten the hinge screws or add a small washer for additional friction.
Finally, place the folded chair against a wall or in a garden shed to confirm that it lies flat and occupies minimal space. The success of your folding Adirondack chair is measured not just by comfort, but by how effortlessly it transitions between use and storage.
Customization Ideas and Practical Tips for Folding Adirondack Chair Plans
Every woodworking project invites personalization. Below are several ideas to tailor your chair to specific needs, aesthetic preferences, or regional climates.
Adding a Portable Carry Handle
Install a small metal or leather strap across the back of the seat. This provides a convenient grip for moving the folded chair, especially useful for beach outings or campsite setups.
Incorporating a Built‑in Storage Pocket
Cut a shallow recess into one of the armrest slats and line it with waterproof fabric. This pocket can hold a paperback, sunglasses, or a small bottle of sunscreen, keeping essentials within reach.
Choosing a Bold Color Palette
If natural wood isn’t your style, consider painting the chair in a vibrant hue that complements your garden décor. Pair the painted chair with Farmhouse Table Decor Ideas to create a cohesive outdoor living area.
Applying a Slip‑Resistant Bottom
Attach rubber foot caps or a non‑slip mat to the bottom of each leg. This prevents the chair from sliding on wet decks and protects delicate flooring surfaces.
Using Sustainable Materials
For eco‑conscious builders, reclaimed barn wood or responsibly sourced bamboo can replace traditional lumber. Ensure the reclaimed wood is treated for outdoor use and free of nails or metal fragments.
Maintenance and Longevity: Keeping Your Folding Adirondack Chair in Top Shape
Even the most robust chair benefits from regular care. Follow these maintenance steps to preserve both function and appearance:
- Annual inspection: Check hinges, screws, and latch for looseness. Tighten or replace hardware as needed.
- Re‑seal the finish: Every two to three years, sand lightly and apply a fresh coat of spar urethane to refresh UV protection.
- Clean gently: Use a mild soap solution and a soft brush to remove dirt. Avoid pressure washers, which can force water into joints.
- Store properly: When not in use for extended periods, keep the folded chair in a dry shed or cover it with a breathable tarp.
By adhering to these practices, your folding Adirondack chair will remain a beloved fixture in your garden for many seasons, offering both comfort and flexibility.
Building a piece of furniture that folds neatly yet feels as sturdy as a permanent chair is a rewarding challenge. The folding Adirondack chair plans outlined above balance traditional design with modern practicality, empowering you to craft a versatile seat that enhances any outdoor space.
Whether you’re arranging a weekend patio gathering, setting up a portable lounge for a lakeside retreat, or simply looking for a space‑saving solution for a small balcony, this adaptable chair meets the need with style and durability.
