 Admin
AdminWhen it comes to modern kitchens, the kitchen island cooktop stands out as a game‑changing element that blends performance with design. Homeowners are increasingly opting for an integrated stove on their island because it centralizes the cooking workflow, creates a natural gathering spot, and adds a bold visual statement. Whether you are remodeling a compact urban loft or upgrading a sprawling family kitchen, understanding the nuances of island cooktops can help you make an informed decision that maximizes both utility and aesthetic appeal.
In this comprehensive guide, we will explore the various types of cooktops suitable for islands, the critical considerations for installation, and the latest design trends that keep your space functional and stylish. From gas versus induction to ventilation solutions and ergonomic layout tips, every aspect is covered with the depth and authority you need to feel confident about the investment.
Ready to unlock the full potential of your kitchen? Let’s dive into the details that will turn your island into the heart of the home.
Why Choose a Kitchen Island Cooktop?

Placing a cooktop on a kitchen island isn’t just a matter of aesthetics; it brings tangible benefits that improve daily cooking routines:
- Enhanced Workflow: The classic “work triangle” (sink‑refrigerator‑stove) expands into a “work quadrangle,” allowing you to prep on one side of the island while cooking on the other.
- Social Interaction: Guests can engage with the chef, making meal preparation a shared experience rather than a hidden task.
- Space Optimization: In open‑plan homes, an island cooktop frees up wall space for cabinets, pantry, or additional appliances.
- Design Focal Point: A sleek, high‑end cooktop becomes the centerpiece that ties together countertops, backsplashes, and lighting.
Types of Cooktops for Island Installation
Selecting the right technology is essential because each type offers distinct performance characteristics, safety profiles, and installation requirements.
Gas Cooktops
Gas remains the preferred choice for many professional chefs due to its instant heat control and visible flame. When installing a gas island cooktop, ensure you have a certified plumber to route the gas line safely. Modern gas models often feature sealed burners, which reduce spillage and simplify cleaning.
Induction Cooktops
Induction technology uses magnetic fields to heat cookware directly, delivering rapid temperature changes and high energy efficiency. Because the surface itself stays relatively cool, induction is considered safer for households with children. However, you’ll need compatible magnetic cookware, and the initial cost can be higher than gas.
Electric Coil and Smooth‑Top Cooktops
Traditional electric coil units are affordable but slower to heat. Smooth‑top electric models, such as radiant glass‑ceramic surfaces, provide a sleek look and are easier to clean. They work well in homes where precise temperature control isn’t critical.
Key Considerations Before Installation
Installing a cooktop on an island demands careful planning to avoid costly mistakes. Below are the most critical factors to assess.
Ventilation Solutions
Proper ventilation is non‑negotiable. Without a vent hood, cooking fumes, grease, and heat can linger, affecting indoor air quality. There are two primary approaches:
- Downdraft Ventilation: Integrated directly into the island, the system pulls air downward when activated. It’s ideal for open‑plan designs where a hanging hood would obstruct sightlines.
- Island Hood (Mountable): A traditional hood suspended above the island provides powerful extraction and can become a decorative element. Ensure the ceiling height accommodates the hood’s clearance requirements.
For a detailed look at vent solutions, see our article 10 Brilliant Kitchen Stove Island Ideas That Will Revolutionize Your Cooking Space.
Electrical and Gas Requirements
Each cooktop type has specific power demands:
- Induction: Typically requires a dedicated 40‑amp circuit.
- Electric smooth‑top: Usually needs a 240‑volt, 30‑amp circuit.
- Gas: Must be connected to a properly sized gas line with an automatic shut‑off valve.
Hiring a licensed electrician or plumber is essential to meet local building codes and ensure safety.
Countertop Material Compatibility
The countertop surrounding the cooktop must withstand heat, moisture, and occasional spills. Popular choices include:
- Quartz: Durable and low maintenance, but avoid direct flame contact with gas burners.
- Granite: Naturally heat‑resistant, but requires periodic sealing.
- Solid Surface (e.g., Corian): Seamless appearance, though less heat‑resistant than stone.
Ergonomics and Height
The standard island countertop height is 36 inches, but you may adjust this based on cooking style. A slightly lower height (34‑35 inches) can reduce strain when chopping, while a higher surface (38 inches) might be better for those who prefer a standing posture while cooking. Incorporating a slight lip or a recessed area around the cooktop can prevent spills from reaching the cabinets.
Design Trends Shaping Modern Kitchen Islands

Designers continuously innovate to make island cooktops more functional and visually appealing. Here are the trends gaining traction in 2024.
Mixed‑Material Islands
Combining wood, metal, and stone creates depth and texture. For example, a warm walnut base with a polished quartz countertop and a brushed stainless‑steel cooktop provides a balanced, contemporary look.
Integrated Appliances
Beyond the cooktop, islands now frequently incorporate built‑in ovens, microwaves, and even wine coolers. This creates a self‑contained cooking hub that reduces traffic flow across the kitchen.
Smart Controls and Connectivity
Modern cooktops can be linked to home automation systems, allowing you to pre‑heat burners, monitor cooking temperatures, or receive safety alerts via smartphone. Voice‑activated assistants like Alexa or Google Assistant can also control vent fans and lighting.
Multi‑Function Surfaces
Some island designs feature a removable cutting board or a prep sink that folds into the countertop when not in use. These flexible surfaces maximize the limited island footprint.
Step‑by‑Step Guide to Installing a Kitchen Island Cooktop
While professional installation is recommended, understanding the process helps you ask the right questions and oversee the project.
- Planning and Layout: Sketch the island dimensions, ensuring enough clearance (at least 48 inches) around the cooktop for safe operation.
- Choose Ventilation: Decide between downdraft or overhead hood based on the overall kitchen design.
- Electrical/Gas Preparation: Install dedicated circuits or gas lines, adhering to local codes.
- Countertop Fabrication: Cut the opening for the cooktop with precise measurements (usually 30‑33 inches wide for a 30‑inch unit).
- Mount the Cooktop: Secure the unit using manufacturer‑provided brackets, ensuring a level surface.
- Connect Vent System: Attach the downdraft or hood, sealing all ducts to prevent leaks.
- Test Functionality: Power on the unit, check for gas leaks (if applicable), and verify ventilation performance.
- Finish and Seal: Apply silicone sealant around the edges to protect against moisture.
For more detailed inspiration, check out Unlock the Power of a Kitchen Island Stove: Transform Your Cooking Space Today, which showcases real‑world installations and design solutions.
Maintenance Tips to Keep Your Island Cooktop Pristine

Regular upkeep ensures longevity and optimal performance. Follow these simple practices:
- Clean after each use: Wipe spills promptly with a soft cloth and mild detergent. For gas burners, remove the caps and clean the ports with a toothbrush.
- Use appropriate cookware: Induction requires magnetic pots; non‑stick surfaces should be handled with non‑abrasive tools.
- Inspect ventilation: Clean filters monthly and schedule professional duct cleaning annually.
- Check connections: Verify that gas lines (if any) are leak‑free and that electrical cords are intact.
- Season the surface: For stone countertops, reseal annually to maintain resistance to stains and heat.
Cost Considerations and Budget Planning
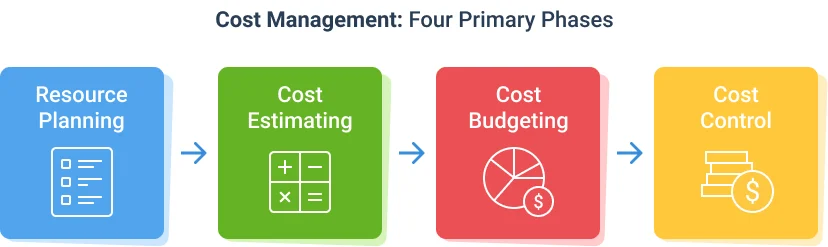
Budgeting for an island cooktop involves more than the appliance price. Below is a typical cost breakdown:
| Item | Typical Range (USD) |
|---|---|
| Cooktop (gas, 30‑inch) | $800 – $1,500 |
| Cooktop (induction, 30‑inch) | $1,200 – $2,500 |
| Ventilation (downdraft system) | $600 – $1,800 |
| Ventilation (overhead island hood) | $400 – $1,200 |
| Electrical / Gas Installation | $300 – $800 |
| Countertop material (quartz, 8‑ft island) | $1,500 – $3,500 |
| Labor (carpentry, finishing) | $1,000 – $2,500 |
Remember to factor in contingency funds for unexpected adjustments, especially when retrofitting an existing kitchen.
Safety First: Best Practices for a Safe Island Cooking Environment
Safety should never be an afterthought. Implement these measures to protect your household:
- Child Locks: Many modern cooktops come with lockout features that prevent accidental activation.
- Heat‑Resistant Mats: Place silicone mats near the cooktop to catch hot pans and reduce burn risk.
- Fire Extinguisher: Keep a Class K fire extinguisher within easy reach, especially when using gas.
- Proper Lighting: Install task lighting above the island to avoid shadows and improve visibility.
Choosing the Right Cooktop Model for Your Lifestyle

Every household has unique cooking habits. Match the features of the cooktop to your needs:
For the Home Chef
Prioritize precise temperature control, high BTU gas burners, or high‑wattage induction zones. Look for bridge elements that let you span large pans or griddles.
For the Busy Family
Seek models with easy‑clean surfaces, auto‑ignition, and pre‑set cooking programs that simplify meals.
For the Eco‑Conscious
Induction cooktops boast up to 90% energy efficiency, and many brands now offer models with recycled materials and low‑VOC finishes.
Future‑Proofing Your Kitchen Island Cooktop
Investing in a cooktop that can adapt to emerging trends protects your renovation’s value. Consider these forward‑looking options:
- Modular Burner Systems: Some manufacturers allow you to replace or add burners as cooking styles evolve.
- Integrated Smart Panels: Touchscreen controls that can be updated via firmware keep the appliance current.
- Universal Power Connections: Wiring that accommodates both 240‑V and 120‑V appliances offers flexibility for future upgrades.
Looking for a broader perspective on kitchen islands? Our piece Transform Your Cooking Space: The Ultimate Guide to Kitchen Island for Stove Mastery dives deeper into layout strategies and accessory integration.
By thoughtfully selecting the right type of cooktop, planning for ventilation, and embracing contemporary design elements, you can turn your kitchen island into a functional masterpiece that serves both culinary and social purposes. The right island cooktop doesn’t just cook meals—it creates memories, enhances home value, and showcases your personal style in the most practical way possible.