 Admin
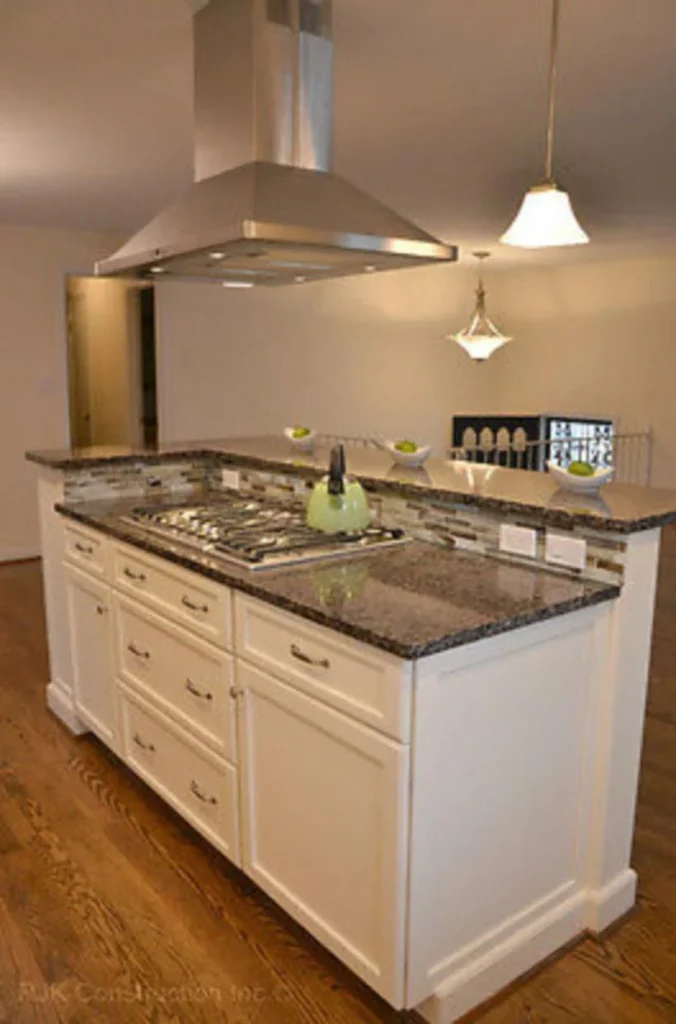
AdminThe kitchen island stove is fast becoming the centerpiece of contemporary kitchens, offering a seamless blend of performance, aesthetics, and social hub‑ability. Homeowners who once confined cooking to a corner countertop now enjoy a centralized cooking arena that invites conversation, encourages collaboration, and maximizes workflow efficiency. In this article we’ll explore every facet of the kitchen island stove—from design fundamentals and appliance selection to installation nuances and long‑term care—so you can decide whether this bold upgrade belongs in your home.
Integrating a stove directly into an island isn’t merely a design flourish; it’s a functional revolution that reshapes how we think about cooking spaces. By positioning heat sources at the exact center of activity, you create a natural gathering point, allowing family members to chat while you sauté, simmer, or sear. The result is a kitchen that feels more like a living room—lively, inclusive, and undeniably modern.
Before diving into the specifics, keep in mind that a successful kitchen island stove hinges on thoughtful planning, proper ventilation, and a clear understanding of the lifestyle you want to support. Let’s break down the essential considerations that will guide you from concept to completion.
Why Kitchen Island Stoves Are Transforming Modern Kitchens

Centralized Cooking Experience
Placing the stove in the island moves the cooking zone from the periphery to the core of the room. This shift changes the kitchen’s traffic pattern, allowing you to face guests while you work. The psychological effect is powerful: cooking becomes a performance, and the chef becomes the host.
Space Efficiency and Social Interaction
- Open‑Plan Flow: By freeing up wall space, you can allocate more room for cabinets, pantry shelves, or a built‑in coffee bar.
- Conversation Hub: The island’s countertop can double as a breakfast bar or a casual dining spot, encouraging spontaneous dialogue.
- Multi‑Tasking: While the stovetop sizzles, a child can do homework at the same island, and a partner can prep ingredients on the opposite side.
These benefits echo the principles outlined in Unlock the Secret to Stunning Spaces with Creative Kitchen Islands – Your Ultimate Design Guide, which emphasizes the island’s role as both workhorse and gathering place.
Design Considerations for a Kitchen Island Stove

Size and Layout
The island must be proportionate to the overall kitchen footprint. A general rule of thumb is to maintain at least 42‑inches of clearance on all sides to ensure safe movement. If your kitchen measures 12 × 15 feet, a 6‑foot‑long island with a 30‑inch depth works well, leaving ample breathing room.
Ventilation and Safety
Cooking produces heat, steam, and airborne particles; proper ventilation is non‑negotiable. Options include:
- Downdraft Ventilation: Integrated directly into the island, it pulls smoke downward, preserving the clean lines of a minimalist kitchen.
- Overhead Range Hood: If ceiling height permits, a sleek hood can be suspended above the island, offering powerful extraction without compromising aesthetics.
- Recirculating Filters: For apartments where exterior venting is impossible, high‑efficiency charcoal filters can mitigate odors.
Material Choices
The countertop material surrounding the stove must endure high temperatures and resist staining. Popular selections include:
- Quartz (engineered stone) – non‑porous and low maintenance.
- Solid surface (e.g., Corian) – seamless integration with integrated sinks.
- Granite – classic look with excellent heat resistance, though it requires periodic sealing.
Remember to use heat‑resistant backsplash tiles to protect walls from splatter and to create a cohesive visual frame.
Choosing the Right Stove Top for Your Island
Gas vs. Electric vs. Induction
Each fuel type delivers distinct advantages:
- Gas: Instant flame control, visible heat, and lower operating costs for those who love the traditional cooking experience.
- Electric (coil or smooth‑top): Even heat distribution and easier cleaning, ideal for modern kitchens that prioritize sleek surfaces.
- Induction: Rapid heating, precise temperature control, and heightened safety—since the surface stays relatively cool.
When deciding, weigh factors such as local utility rates, cooking style, and the level of tech integration you desire.
Burners and Power Output
Most island stoves feature 4‑6 burners. Consider the following configuration:
- One high‑output burner (≥15,000 BTU) for wok‑style cooking or rapid boils.
- Two medium burners (9,000‑12,000 BTU) for everyday sautéing and simmering.
- One low‑output burner (≤5,000 BTU) for delicate sauces or chocolate melting.
- Optional griddle or wok ring for specialty cooking.
Aesthetic Integration
The stove’s exterior should complement the island’s design language. Stainless steel offers a timeless, industrial feel, while black glass or matte black finishes deliver a contemporary edge. Matching the control knobs to other hardware in the kitchen—such as cabinet pulls or faucet handles—creates visual harmony.
Installation Process and Common Pitfalls
Planning the Utility Runs
Running gas, electricity, and ventilation ducts to a central island is more complex than a wall‑mounted range. Engage a qualified designer early to map out:
- Gas line length and pressure requirements.
- Dedicated 240‑volt circuit with appropriate breaker size.
- Vent duct path, ensuring minimal bends to preserve airflow.
Professional vs. DIY Installation
While seasoned DIYers can tackle the countertop and cabinetry, stove installation should involve licensed professionals for:
- Gas line connections—improper sealing can lead to leaks.
- Electrical wiring—code compliance is essential to avoid fire hazards.
- Ventilation—incorrect sizing can cause back‑drafting and poor indoor air quality.
Attempting a DIY install without proper permits can void warranties and insurance coverage.
Troubleshooting Common Issues
After installation, keep an eye out for:
- Uneven flame distribution (gas): May indicate clogged burners.
- Insufficient power (electric/induction): Check circuit amperage and ensure the breaker isn’t shared with other high‑draw appliances.
- Vent noise or odor buildup: Verify vent hood capacity (CFM) matches the stove’s BTU output.
Enhancing Functionality Around the Island Stove

Adding a Downdraft Vent
Downdraft systems blend seamlessly into the island’s surface, retracting when not in use. Choose a model with at least 300 CFM for effective smoke extraction on a six‑burner gas stove.
Incorporating Storage and Prep Space
Maximize efficiency by installing:
- Pull‑out spice racks directly beneath the stove.
- Deep drawers for pots, pans, and cutting boards.
- Integrated cutting stations with built‑in colanders and compost bins.
Seating and Entertaining
Pair the island with comfortable seating to encourage lingering. A Sophie 3‑Piece Modular Sofa Chaise positioned nearby can transform the cooking zone into a relaxed lounge area, perfect for brunches or weekend gatherings.
Maintenance and Longevity

Cleaning Tips
Regular upkeep preserves both performance and appearance:
- Gas burners: Remove grates weekly, soak in warm, soapy water, and clear ports with a soft brush.
- Induction surfaces: Wipe with a non‑abrasive cleaner; avoid steel wool that can scratch the glass.
- Stainless steel exteriors: Use a microfiber cloth and a stainless‑steel cleaner to avoid water spots.
Regular Inspection
Schedule a professional check‑up at least once a year. Inspect gas lines for signs of wear, test electrical connections for heat, and ensure the vent system remains free of debris.
Upgrading Components
Technology evolves quickly. When it’s time to replace burners, consider high‑efficiency models that deliver more BTUs per unit of gas, or upgrade to a smarter induction system that integrates with voice assistants for hands‑free control.
Incorporating a kitchen island stove is a substantial investment, but one that pays dividends in daily convenience, social connectivity, and resale value. By following the design guidelines, selecting the right appliance, and committing to proper installation and maintenance, you’ll create a chef‑ready centerpiece that not only meets your culinary needs but also elevates the entire heart of your home.
