 Admin
Admin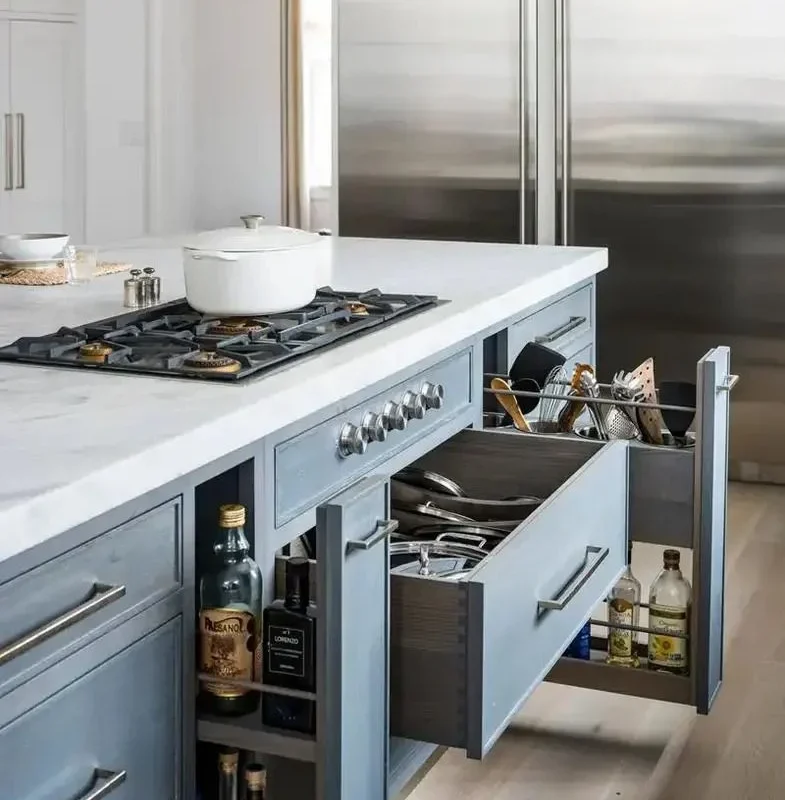
When the heart of a home evolves beyond a mere cooking surface, the kitchen islands with stove become the centerpiece of both utility and style. Homeowners increasingly seek a seamless blend of preparation space, social interaction, and the visual drama of a built‑in cooktop. This shift reflects broader trends toward open‑plan living, where the kitchen is no longer a secluded work zone but a gathering place that commands attention.
Integrating a stove directly into an island poses unique challenges and opportunities. From proper ventilation and safe clearances to the aesthetic harmony of materials, each decision influences how the space functions day‑to‑day and how it feels during gatherings. Whether you are renovating a compact condo kitchen or redesigning a sprawling gourmet suite, understanding the core principles behind kitchen islands with stove will ensure your project delivers both performance and visual impact.
In the sections that follow, we’ll explore layout considerations, essential safety standards, design trends, and practical tips for installation. You’ll also discover how to coordinate your island’s appliances with the rest of your kitchen’s workflow, creating a cohesive environment that encourages culinary creativity and effortless entertaining.
Kitchen Islands With Stove: Core Layout Strategies

Choosing the right layout is the foundation of a successful island stove integration. The classic work triangle—connecting the refrigerator, sink, and stove—still applies, but an island adds a fourth node that can either enhance or disrupt flow. Below are the most common configurations.
Kitchen Islands With Stove in a Linear Layout
- Parallel to the main work line: Position the island opposite the primary countertop so the cook can face the rest of the kitchen. This arrangement promotes interaction while maintaining a clear pathway for the main traffic.
- Clearance guidelines: Aim for a minimum of 42‑48 inches between the island and surrounding cabinets or appliances. This space allows for comfortable movement and safe opening of oven doors.
- Ventilation focus: Install a downdraft vent or a ceiling-mounted hood that aligns with the stove’s cooking zone, ensuring smoke and odors are captured efficiently.
Kitchen Islands With Stove in an L‑Shaped Design
- Dual‑purpose zones: One leg of the “L” can house the stove while the adjoining leg provides a prep sink or dishwasher, creating a compact but highly functional work zone.
- Visual separation: Use contrasting countertop materials or a change in island height to delineate the cooking area from the prep space, preserving aesthetic balance.
- Safety considerations: Ensure the stove’s backguard is at least 12 inches above any adjacent cabinets to reduce fire risk.
Island Height Variations for Kitchen Islands With Stove
Standard countertop height is 36 inches, but incorporating a stove may warrant a slightly taller island (38‑42 inches) to accommodate a comfortable cooking stance. If you prefer a bar‑style island for casual dining, a two‑tier design—lower cooking level with an elevated bar top—offers both functionality and social appeal.
Choosing the Right Stove for Your Island
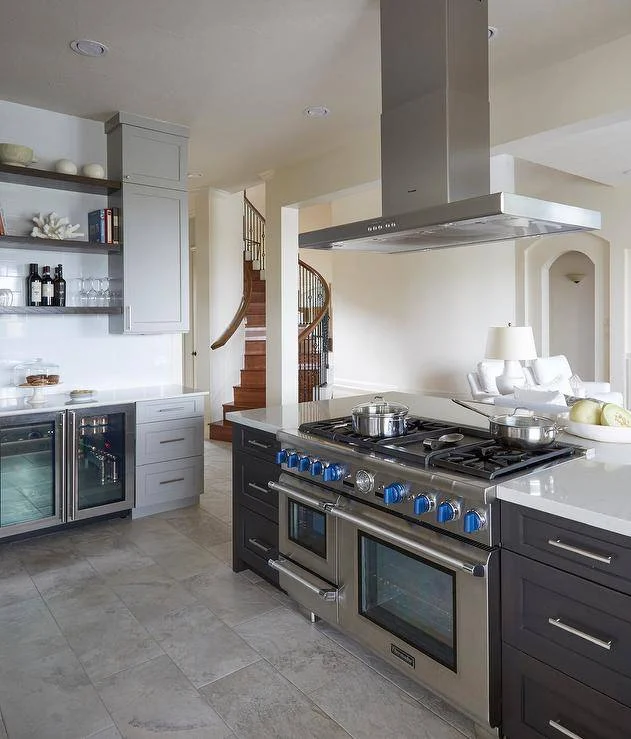
The stove type you select will dictate many of the island’s design elements. Below is a quick guide to help you match appliance features with your kitchen’s overall vision.
Gas vs. Electric vs. Induction in Kitchen Islands With Stove
- Gas burners: Provide immediate heat control and visible flames, favored by professional chefs. Ensure you have a proper gas line installed and incorporate a flame‑proof backsplash.
- Electric coil or smooth‑top: Simpler installation, often cheaper, but slower to heat and cool. Pair with a robust vent hood to handle any lingering steam.
- Induction cooktops: Offer rapid heating, precise temperature control, and enhanced safety (the surface stays cool). They require compatible cookware and a dedicated electrical circuit.
Integrating Advanced Features
Modern island stoves can include built‑in griddles, wok burners, or even a built‑in grill. When selecting these options, verify that the island’s structural support can handle the added weight and that the ventilation system is sized accordingly. For inspiration on optimizing your cooktop setup, see Transform Your Kitchen: The Ultimate Guide to Mastering the Stove Top in Island Concept.
Ventilation Solutions for Kitchen Islands With Stove
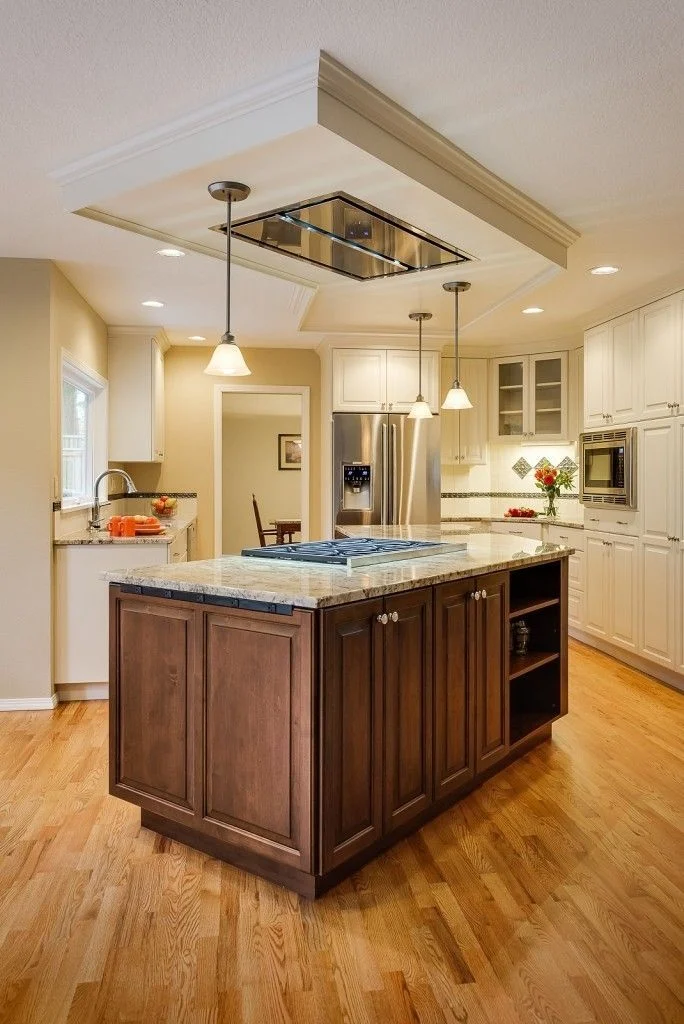
Effective ventilation is non‑negotiable when a stove sits in the middle of the room. Poor airflow can lead to lingering odors, grease buildup, and even safety hazards. Below are the most reliable approaches.
Downdraft Vent Systems
Downdraft vents are installed directly behind the cooktop and rise when activated, pulling smoke and steam downward before venting it through the cabinet or floor. This option preserves the island’s clean lines and is ideal for modern, minimalist designs.
Island Hood Ventilation
A suspended island hood provides powerful extraction and serves as a striking visual element. When selecting a hood, match the CFM (cubic feet per minute) rating to the stove’s BTU output—generally, 100 CFM per 10,000 BTU is a good rule of thumb.
Combination Systems
Some designers incorporate both a downdraft and a supplemental ceiling-mounted exhaust, especially in large islands that feature multiple cooking zones. This dual approach ensures consistent airflow even during high‑heat cooking sessions.
Materials, Finishes, and Aesthetic Cohesion

The visual appeal of kitchen islands with stove hinges on material choices that balance durability with style. Countertops, backsplashes, and cabinet fronts should complement both the cooking equipment and the surrounding décor.
Countertop Options
- Quartz: Non‑porous, heat‑resistant, and low‑maintenance. Ideal for a sleek, uniform look.
- Granite: Offers natural variation and excellent heat tolerance, but requires periodic sealing.
- Butcher block: Adds warmth and a rustic feel; pair with a heat‑resistant mat to protect the wood.
Backsplash Strategies
A backsplash not only protects walls from splatter but also becomes a design focal point. Consider full‑height glass tiles for a reflective surface, or a coordinating metal tile that echoes the stove’s hardware. For broader design inspiration, check out Design and Aesthetic Appeal.
Cabinetry and Trim
Choosing cabinet finishes that either match or contrast with the island can delineate the cooking zone. High‑gloss cabinets can enhance a contemporary vibe, while matte wood adds depth. Ensure any cabinet above a gas stove is made from fire‑rated material.
Safety and Building Code Essentials
Compliance with local building codes is critical when installing kitchen islands with stove. Failure to adhere to regulations can result in costly retrofits or, worse, safety incidents.
Clearance Requirements
- Minimum 30 inches of clearance above gas burners to prevent flame contact with cabinetry.
- At least 24 inches of side clearance to allow safe opening of oven doors and access to controls.
- Electrical outlets for electric or induction cooktops must be GFCI‑protected and meet the amperage specifications of the appliance.
Fire‑Resistant Materials
All surfaces directly above a gas stove should be constructed from non‑combustible materials such as stainless steel, tile, or tempered glass. For electric and induction units, a heat‑resistant countertop material like quartz is advisable.
Ventilation Compliance
Many jurisdictions require that vent hoods meet specific airflow standards based on the stove’s output. Verify that the chosen hood’s CFM rating aligns with local code and that ductwork is installed with minimal bends to preserve efficiency.
Installation Process: Step‑by‑Step Overview

Installing a stove in an island is a multi‑disciplinary project that typically involves a kitchen designer, contractor, electrician, plumber, and sometimes a structural engineer. Below is a concise roadmap to keep the project on track.
Phase 1: Design and Planning
- Measure the kitchen’s dimensions and establish the island’s footprint.
- Choose the stove type and confirm required clearances.
- Select ventilation, countertop, and cabinet finishes.
- Create detailed drawings for contractor review.
Phase 2: Structural Preparation
- Verify floor joist capacity; reinforce if the stove and island exceed standard load limits.
- Install a dedicated gas line or electrical circuit, adhering to local codes.
- Prep the vent ducting route—either through the floor, ceiling, or a wall chase.
Phase 3: Fabrication and Assembly
- Construct the island base, integrating cabinets, drawers, and any plumbing for a sink.
- Install the countertop, ensuring a precise cutout for the stove.
- Mount the vent hood or downdraft mechanism, sealing all connections.
Phase 4: Final Hook‑up and Testing
- Connect the gas or electricity, perform leak tests, and verify voltage.
- Calibrate the vent system, checking for proper airflow.
- Conduct a burn‑in test of the stove to ensure safe operation.
- Finish with final trim work, backsplash installation, and cleaning.
Following a systematic approach minimizes surprises and ensures that your kitchen islands with stove deliver both performance and lasting beauty.
Maintaining Your Island Stove Setup

Regular maintenance prolongs the life of your island stove and keeps the surrounding surfaces pristine.
Cleaning Routines
- Wipe down the countertop after each use to prevent heat stains.
- Clean the vent filters monthly—grease buildup reduces efficiency.
- For gas burners, inspect and clean the igniters and ports every six months.
Seasonal Checks
Before heavy cooking seasons (e.g., holidays), perform a comprehensive safety inspection. Verify that vent ducts are free of obstructions, gas connections are leak‑free, and the electrical circuit remains stable.
By staying proactive with maintenance, your kitchen islands with stove will continue to serve as the vibrant hub of your home for years to come.
Integrating a stove into a kitchen island transforms the space from a functional work area into a dynamic gathering point. Through careful planning—balancing layout, ventilation, material selection, and safety—you can create an island that not only meets the demands of daily cooking but also elevates the social atmosphere of your home. Whether you opt for a sleek quartz top with a downdraft vent or a rustic wood island crowned with a bold stainless‑steel hood, the key is harmony between form and function. With the guidance provided here, you’re equipped to embark on a project that blends culinary efficiency with timeless design, ensuring your kitchen remains the heart of the home.
