 Admin
AdminWhen a toilet starts leaking at its base, the culprit is almost always a faulty wax ring. Replacing this humble gasket can save you from water damage, mold growth, and expensive plumber bills. In this comprehensive guide, we’ll walk you through every stage of the process—from gathering the right tools to testing the seal—so you can tackle the job with confidence.
Whether you’re a seasoned DIY enthusiast or a first‑time homeowner, understanding why the wax ring matters is essential. A properly installed ring creates a watertight barrier between the toilet’s porcelain and the waste pipe, preventing sewer gases and water from escaping. If you’re curious about the science behind it, check out Understanding the Role of the Wax Ring for a deeper dive.
Tools and Materials You’ll Need
- Adjustable wrench or a socket set (½‑inch)
- Flat‑head screwdriver
- Rubber gloves
- Bucket or large bowl
- Old towels or rags
- New wax ring (standard or reinforced)
- Plumber’s putty or silicone sealant (optional)
- Level (to check toilet alignment)
Safety First: Preparing the Work Area

Turn Off the Water Supply
Locate the shut‑off valve behind the toilet and turn it clockwise until it stops. Open the toilet flapper to drain the tank, then flush once more to remove as much water as possible from the bowl.
Protect Your Flooring
Lay down old towels or a drop cloth around the base of the toilet. This prevents water spills and protects fragile flooring from scratches while you work.
Ventilation and Protective Gear
Although the wax ring itself isn’t toxic, it can get messy. Wear rubber gloves and, if your bathroom is small, open a window or run the exhaust fan to keep the area well‑ventilated.
Removing the Old Wax Ring
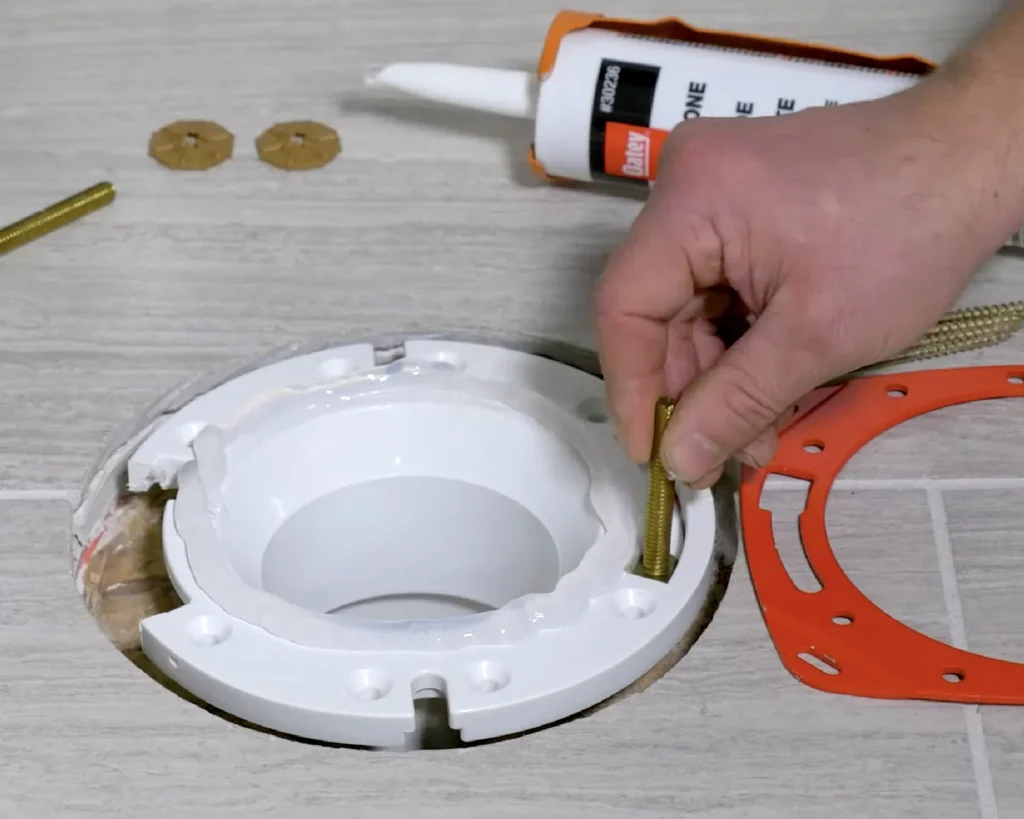
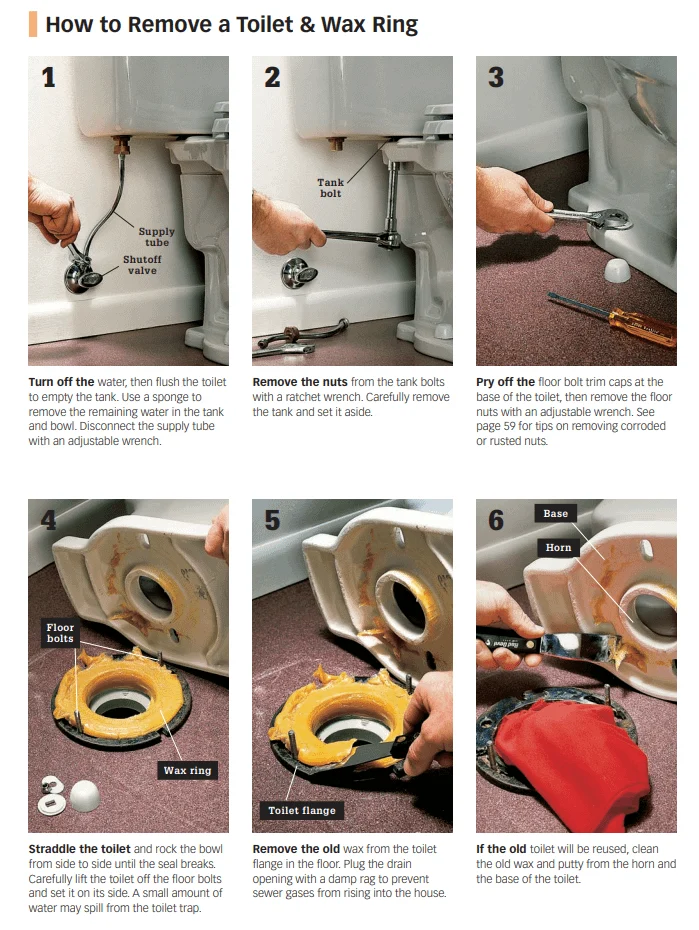
Disconnect the Water Line
Using the adjustable wrench, loosen the nut connecting the water supply hose to the toilet’s fill valve. Have the bucket ready to catch any residual water.
Unscrew the Closet Bolts
At the base of the toilet, you’ll see two (sometimes three) bolts secured with washers and nuts. Remove these nuts with a wrench, then gently rock the toilet back and forth to break the seal. If the toilet feels stuck, tap the base lightly with a rubber mallet.
Lift the Toilet
Enlist a helper if possible—most toilets weigh 70‑150 pounds. Grasp the tank (if it’s a two‑piece model) or the bowl, and lift straight up. Place the unit on the towels you prepared earlier.
Scrape Away the Old Wax
Using a putty knife or an old credit card, scrape the remaining wax from the flange on the floor and the underside of the toilet. Be thorough; any residual wax can compromise the new seal.
Inspecting the Flange and Preparing for the New Ring
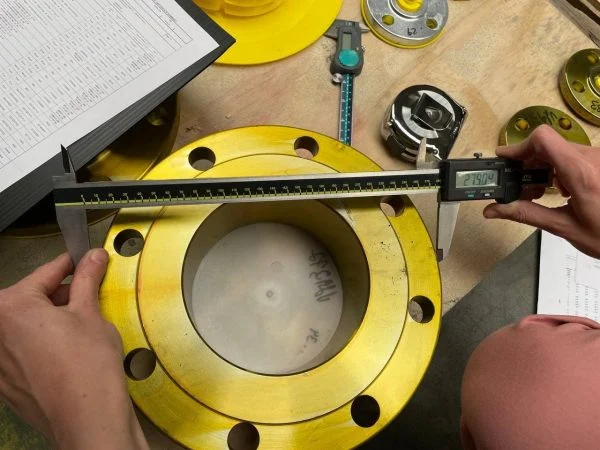
Check Flange Condition
Examine the closet flange for cracks, corrosion, or signs of movement. A damaged flange may need to be repaired or replaced before installing a new wax ring. If the flange is recessed too far below the floor, consider using a flange extender.
Cleaning the Area
Vacuum any debris and wipe the flange clean with a damp rag. Allow it to dry completely before proceeding.
Installing the New Wax Ring
Choose the Right Type
Standard wax rings work for most installations, but if your toilet sits lower than the flange or you have a slightly uneven floor, a reinforced or wax‑free rubber ring may be a better option.
Position the Wax Ring
Place the new wax ring directly onto the flange, ensuring it’s centered. Some installers prefer to set the ring on the toilet outlet first; either method works as long as the ring remains in place when the toilet is lowered.
Set the Toilet Back in Place
Carefully lower the toilet onto the wax ring, aligning the bolt holes with the closet bolts. Press down firmly and evenly—about 30‑40 pounds of weight—to compress the wax and create a tight seal. Avoid rocking the toilet; a smooth, vertical placement is key.
Secure the Toilet
Replace the washers and nuts on the closet bolts. Tighten them alternately, a little at a time, to keep the toilet level. Use a level to confirm the bowl is perfectly horizontal; adjust as needed before fully tightening.
Reconnect the Water Supply
Reattach the supply hose to the fill valve, hand‑tighten the nut, then give it a final quarter‑turn with the wrench. Open the shut‑off valve and allow the tank to fill.
Testing for Leaks

Initial Flush Test
Flush the toilet several times and watch the base closely. Look for any water seeping out from under the bowl. If you see a leak, gently tighten the closet bolts a bit more—do not overtighten, as this can crack the porcelain.
Check the Supply Line
Inspect the connection where the water line meets the fill valve. Tighten any loose fittings and ensure there’s no drippage.
Final Inspection
After a 10‑minute wait, wipe the floor dry and re‑examine the area. If everything remains dry, your wax ring replacement was a success.
Maintenance Tips to Extend the Life of Your Wax Ring
- Avoid Heavy Loads: Don’t sit on the toilet with excessive weight (e.g., standing on the seat) as this can stress the seal.
- Periodic Checks: Every few months, look for signs of moisture at the base. Early detection prevents larger problems.
- Use a Wax‑Free Seal for High‑Traffic Restrooms: In commercial settings, consider wax‑free silicone rings for longer durability.
- Seal the Flange: Applying a thin bead of plumber’s putty around the flange before the wax ring can add an extra layer of protection.
When to Call a Professional
If you encounter any of the following situations, it’s wise to bring in a licensed plumber:
- Severe flange damage that requires replacement.
- Persistent leaks after multiple tightening attempts.
- Cracks in the toilet bowl or tank.
- Lack of proper tools or assistance for lifting a heavy toilet.
For those who prefer a guided approach, the article Replace Wax Ring Like a Pro: Stop Leaks and Save Money offers additional troubleshooting tips and video demonstrations.
Changing a wax ring is one of the most rewarding DIY plumbing tasks you can master. With the right preparation, tools, and a steady hand, you’ll eliminate unsightly leaks and protect your bathroom from water damage—all while saving a bundle on professional fees. Remember to follow each step carefully, test thoroughly, and enjoy the peace of mind that comes from a job well done.
